Learn to work with records about data, apps, websites, and users
Working with records, viewing them, and gaining important info from them is simple and intuitive in Safetica NXT.
In this article, you will learn more about:
Date picker
Via the date picker at the top of the screen, you can define the time range you are interested in.
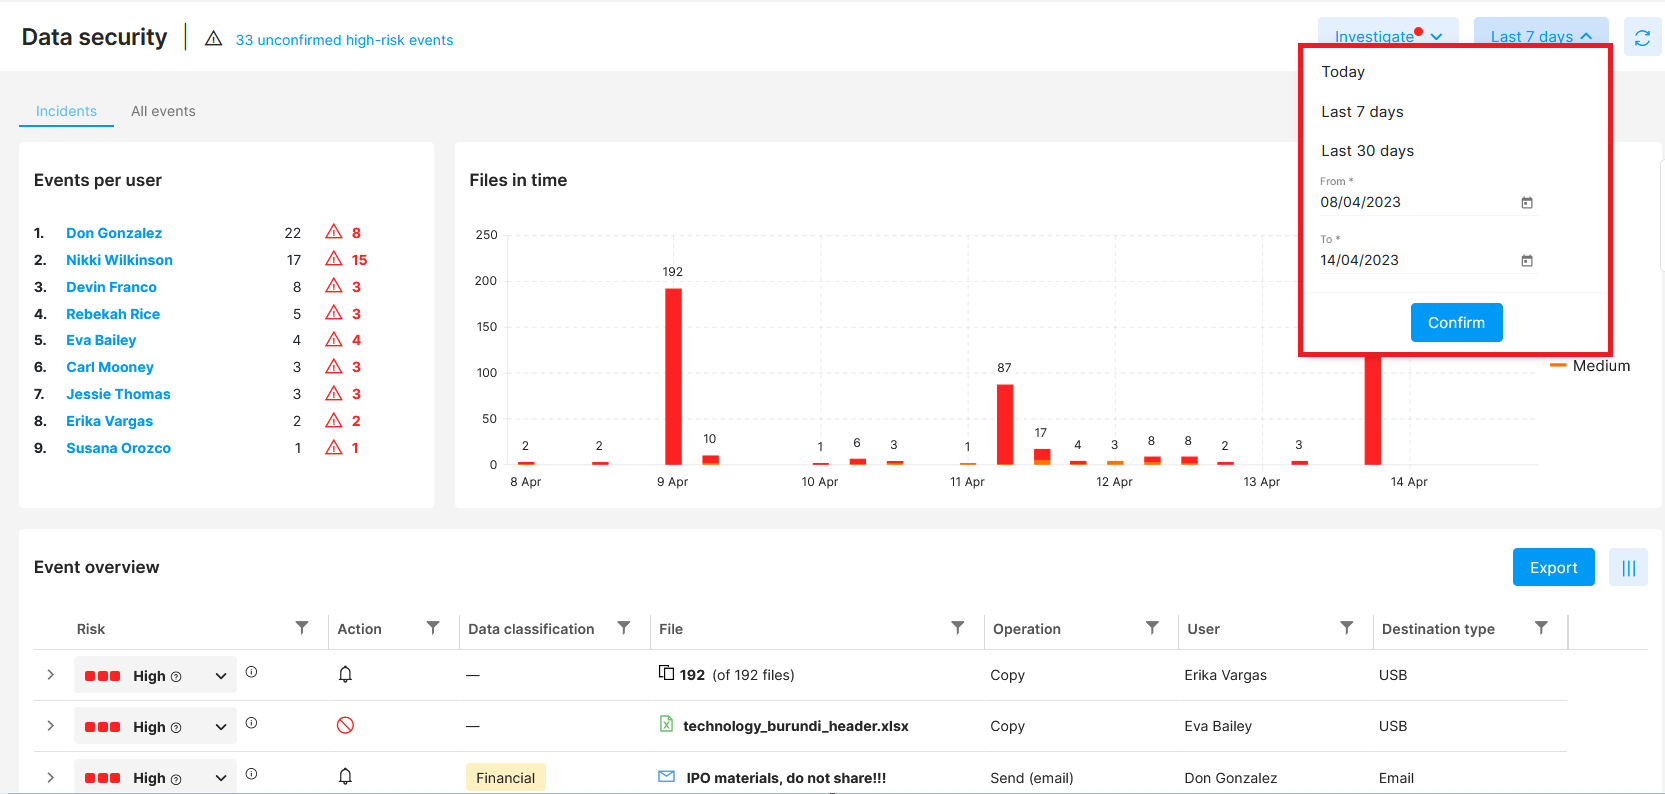
You can also pinpoint a specific time range in the Files in time chart - just drag the mouse over your desired time interval.
Filters in Safetica NXT
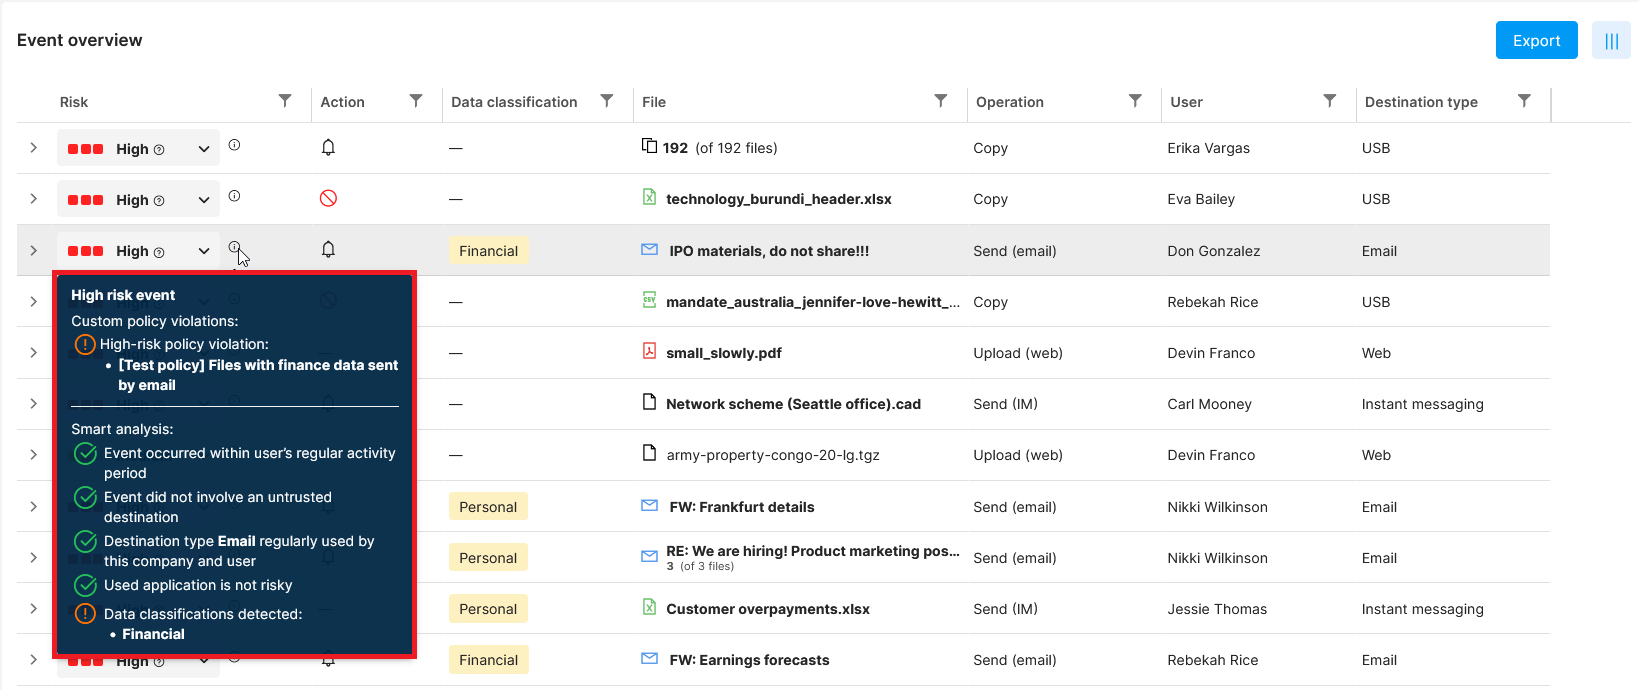
You can filter records related to data, apps, websites, users, or devices based on many things, such as destination, file size, the action taken by protection policies, the application used, and many others.
Example: Find if there were any attempts to copy files to USB drives that were blocked by protection policies. This will help you see whether there were any potential attempts to leak data.
Investigations
In Data security, you can store various filter settings as custom investigations under unique names. You can then use these investigations any time to only display info you are interested in.
There are several predefined investigations in the Investigate drop-down, so you can see important issues faster.
To create an investigation:
- Go to Data security > Event overview and apply your desired filters.
- Click the Save investigation button and enter a name.
- The newly created investigation is stored in the Investigate drop-down.
Investigations with detected high-risk events are highlighted in red.
All filters show the number of detected events in brackets.
To delete an investigation, click  next to it in the Investigate drop-down.
Example: How to create an investigation that will show spreadsheet files transferred to USB.
Customizing visible columns
You can add or hide columns based on your needs via the column picker  . You can also change their size.
The Refresh button ![]() refreshes the whole page (i.e. data in widgets and in the table).
refreshes the whole page (i.e. data in widgets and in the table).
Export
Click the Export button to export and download the info from Data security > Event overview table. If you apply filters before exporting, the downloaded list of events will also be filtered.
For risky events, the reason why they are considered dangerous is always part of the export.