Product plans: Premium | Enterprise | On-Prem (see: Limits by plan)
Introduction
Safetica already protects devices by detecting data-leaks and insider-threats. Sending Safetica insights or Admin trail records (records of admin's actions in Safetica console) to your SIEM (Security Information & Event Management) system lets you correlate them with security data from other sources (e.g., firewall, EDR, or network logs) for an even more comprehensive threat analysis.
✍️Safetica sends insights and Admin trail records to your SIEM in OCSF-formatted JSONs via webhooks. This standardized format ensures compatibility across different SIEM platforms.
Syslog is currently not supported.
In this article, you will learn more about:
- Prerequisites of SIEM integration
- Permissions
- How to set up Safetica integration with SIEM
- How to edit Safetica integration with SIEM
- How to remove Safetica integration with SIEM
Prerequisites
- SIEM system: Any SIEM system that can receive data via webhooks. This includes, but is not limited to:
- QRadar
- Rapid7
- Splunk
- FortiSIEM
- Network connectivity between Safetica and your SIEM system.
- ✨Safetica Platform only: If your SIEM setup uses IP allowlisting (your SIEM only accepts data from approved IP addresses), you need to whitelist Safetica’s outbound IP address that matches the data center where your Safetica is hosted:
- EU: 52.232.44.144
- US: 4.155.7.85
- BR: 20.226.40.46
SIEM integration permissions
Permissions for integrating Safetica with SIEM are as follows:
- Activate or edit SIEM integration: Only Safetica admins with the Settings and configuration permission can activate or edit the SIEM integration. The permission can be enabled or disabled in Settings > Accounts and permissions.

How to set up Safetica integration with SIEM
- In Safetica console, go to:
- ✨Safetica Platform: Integrations and click Activate SIEM integration.
- 💻Safetica On-Prem: Cloud services and click Activate SIEM integration.
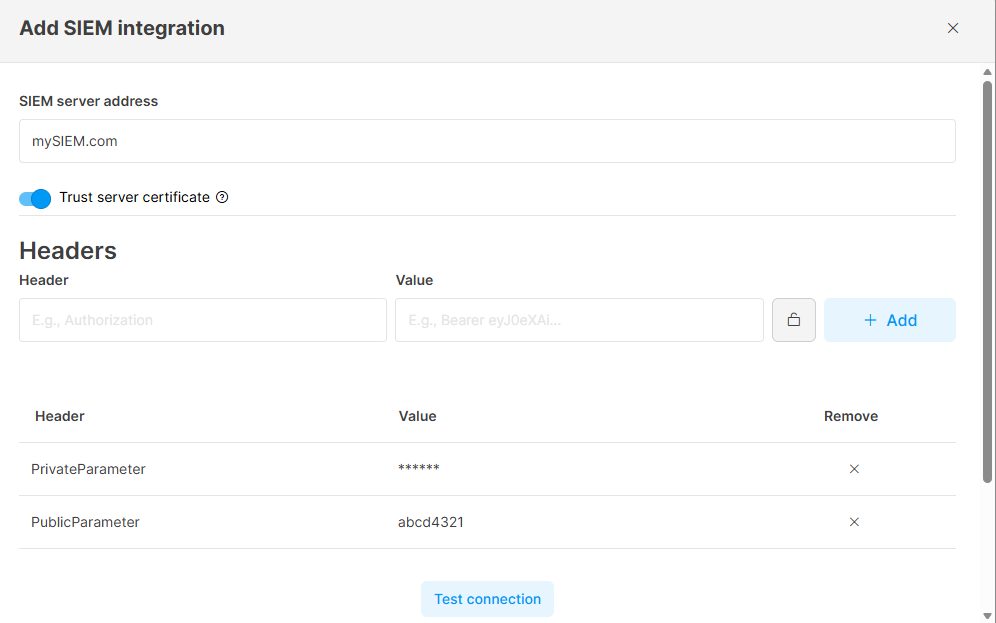
- SIEM server address: Enter the SIEM-specific webhook URL.
- Trust server certificate: If enabled, the server’s SSL certificate will be accepted without validation. This allows you to securely connect even when your SIEM server uses a self-signed or internal certificate.
- Add custom headers (optional): For SIEMs that rely on unique authorization headers, you can add Header: Value pairs. Click +Add after entering each pair. Examples:
-
- SIEMs with a shared URL for all environments (e.g., Splunk): You must supply unique authorization headers.
- SIEMs with unique URLs that identify your environment (e.g., Rapid 7): No extra headers are required.
-
✍️Private parameters: Sensitive header values can be hidden under **** in Safetica console and stored encrypted in the database – just click the lock icon.
4. Test the connection: Click the Test connection button to verify that the connection to your SIEM works properly and that Safetica can successfully send insights or Admin trail records to your SIEM.
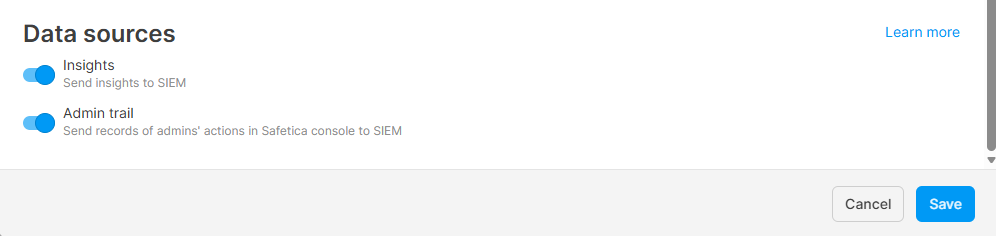
6. Data sources: Select what to send to your SIEM - insights, Admin trail records, or both.
7. Click Save. Safetica will start sending insights or Admin trail records to your SIEM in OCSF-formatted JSONs. You can then filter, correlate, and analyze them in your SIEM alongside other security events.
✍️Safetica will send all insights (from low to high severity) or Admin trail records to your SIEM. No further configuration is needed.
❗For now, only one SIEM integration can be configured at a time.
How to edit Safetica integration with SIEM
If you already have Safetica integrated with your SIEM and want to make changes to the integration:
- In Safetica console, go to:
- ✨Safetica Platform: Integrations and click Edit SIEM integration.
- 💻Safetica On-Prem: Cloud services and click Edit SIEM integration.

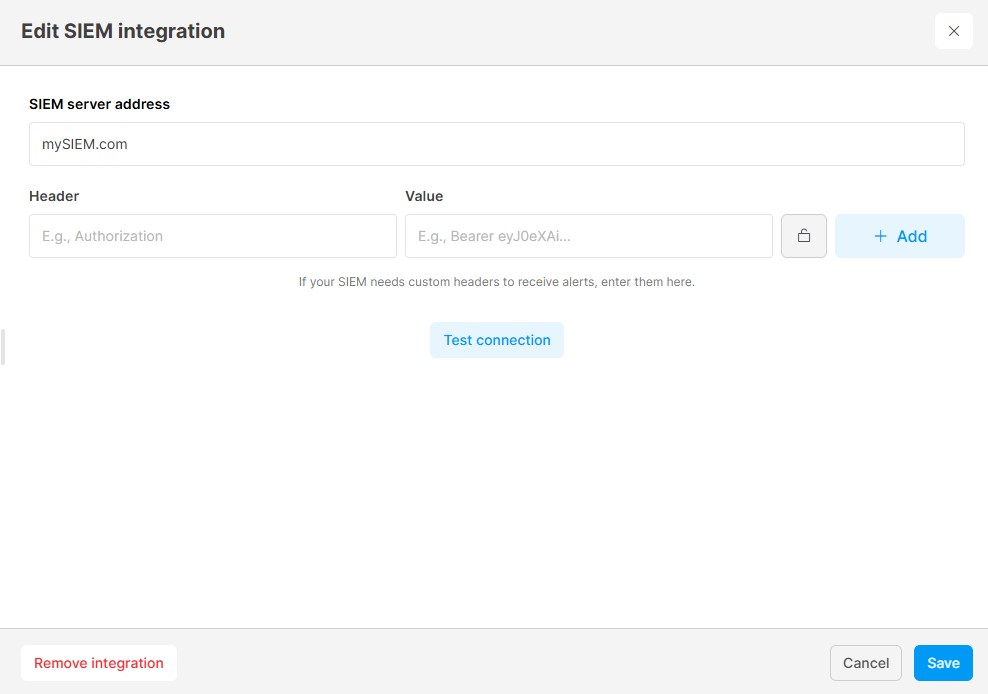
- Make the necessary changes.
- Test the connection and click Save.
How to remove Safetica integration with SIEM
If you have Safetica integrated with your SIEM and want to remove the integration:
- In Safetica console, go to:
- ✨Safetica Platform: Integrations and click Edit SIEM integration.
- 💻Safetica On-Prem: Cloud services and click Edit SIEM integration.
- Click Remove integration.
FAQ
Q: I am getting an SSL connection error when connecting Safetica to my SIEM. What can I do?
A: Please try enabling the Trust server certificate toggle. Afterwards, the server’s SSL certificate will be accepted without validation and should stop causing the error. Only use the toggle for self-signed or internal certificates.