Information in this article applies to Safetica 10 or older.
Our partnership with Netwrix helps you extend your Safetica sensitive data discovery and classification. With the Safetica Compliance extra module, you can easily use Netwrix data categories to set up Safetica DLP policies and data discovery tasks.
Safetica Compliance does not require any Netwrix product in order to provide enhanced data classification with numerous predefined compliance-specific data categories.
In this article, you will learn:
- The prerequisites of using the Safetica Compliance extra module
- How to import the Netwrix taxonomy XML into Safetica Management Console
- How to use Netwrix data categories in DLP policies and data discovery
- What will the admin see in logs
- Optional: How to import custom-created Netwrix taxonomies
The prerequisites of using Safetica Compliance extra module
- Purchase the Safetica Compliance license from Safetica.
- Import the Netwrix taxonomy XML provided by Safetica into Safetica Management Console.
How to import the Netwrix taxonomy XML into Safetica Management Console
You do not need to purchase the Netwrix Data Classification solution in order to import the Safetica-provided XML into Safetica Management Console.
1. Get the Netwrix taxonomy XML from Safetica.
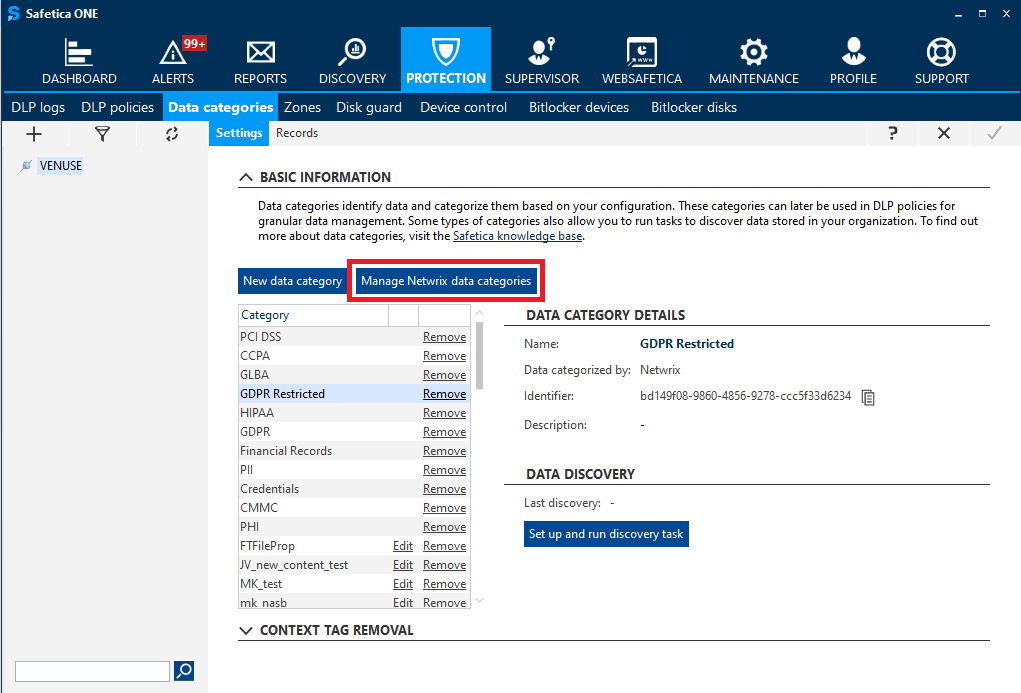
2. In Safetica Management Console, go to Protection > Data categories.
3. Click Manage Netwrix data categories.
4. Click Import configuration XML and select the Netwrix taxonomy XML you received from Safetica.
New Netwrix data categories will be created and displayed in the table below. You can remove the ones you do not need.
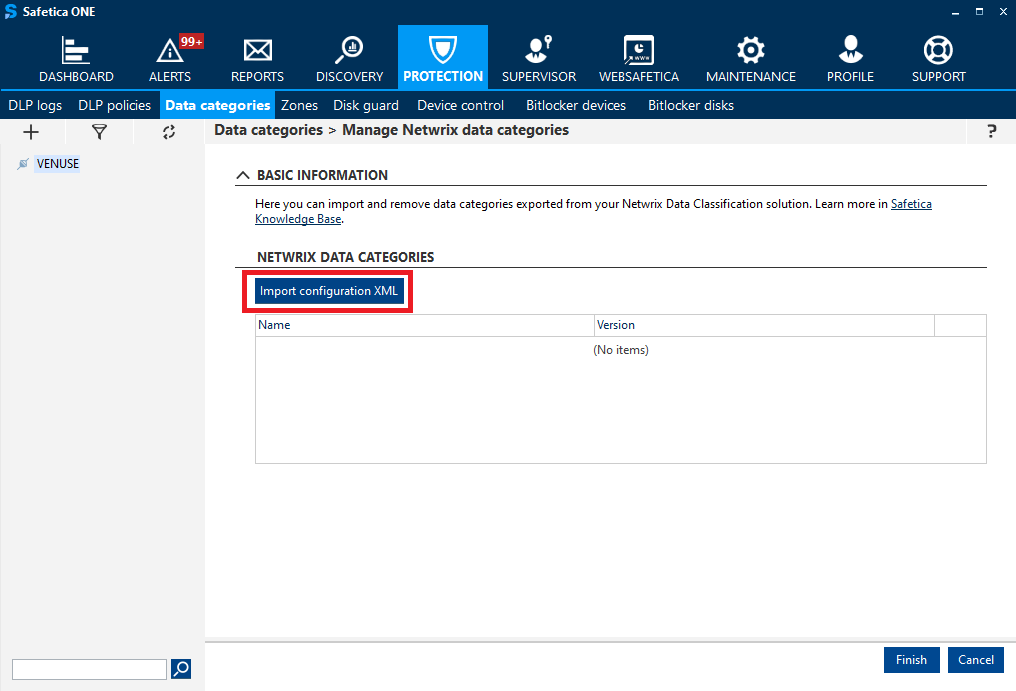
5. Confirm with Finish.
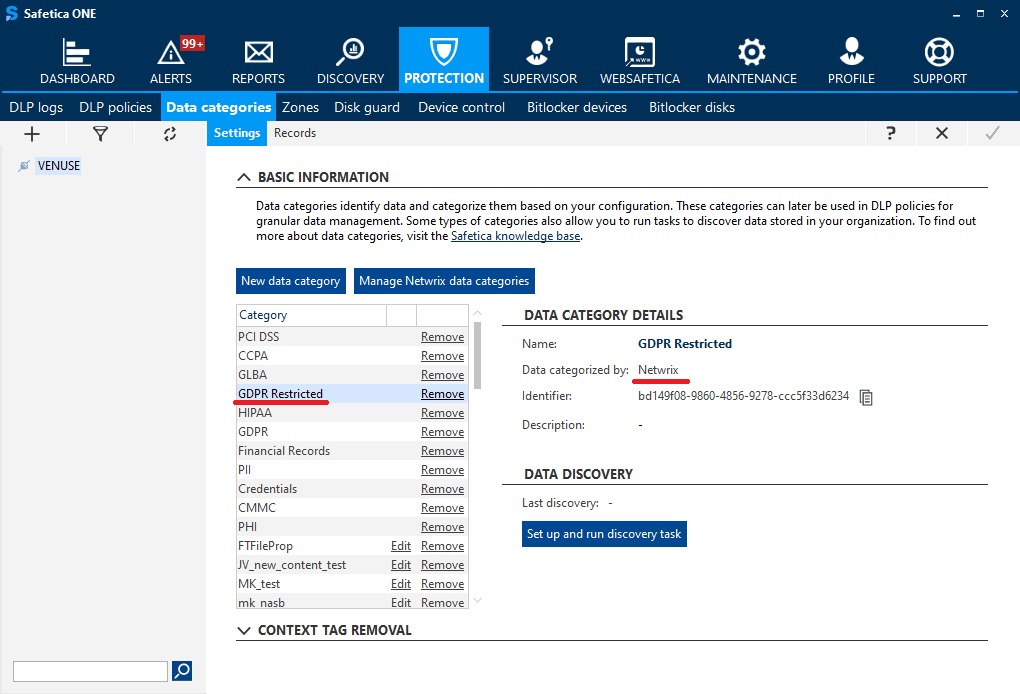
6. You will see the imported Netwrix data categories listed among all the other data categories in Safetica Management Console.
How to use Netwrix data categories in DLP policies and data discovery
You can use Netwrix data categories to set up DLP policies and data discovery tasks. You will also see them in DLP logs.
What will the admin see in logs
To learn where to find the results of data discovery tasks, and also to see what files leave your company and were "caught" by one of your DLP policies, click here.
Optional: How to import custom-created Netwrix taxonomies
If you have both Safetica and Netwrix Data Classification, you can easily export your own custom-created Netwrix taxonomies from the Netwrix Data Classification solution and import them into Safetica.
1. Open Netwrix Data Classification and go to the Dashboard.
2. Click the Content Configuration icon and select Taxonomies.
3. Click Global Settings.
4. Select one or more data categories you want to export, and click Export.
5. The Netwrix taxonomy XML file with selected data categories is created and stored on your computer.
6. Now you can import this XML into Safetica Management Console.