In this article, you will learn more about:
- Introduction
- How to activate Outlook protection in Safetica console
- How to distribute and deploy the Outlook add-in in your company
- How to update the Outlook add-in
- How to deactivate Outlook protection
- Troubleshooting
Introduction
✍️Learn more about our Outlook protection here.
Before you can activate Outlook protection, you must add your Microsoft 365 tenant to Safetica.
You will also need the Microsoft licenses mentioned here.
How to activate Outlook protection in Safetica console
✍️Outlook protection currently supports auditing and protection of sent emails only.
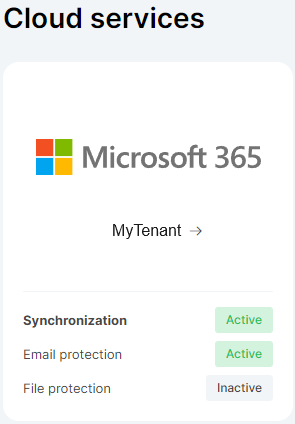
1. In Safetica console, go to Cloud services, and click your M365 tenant.
2. Click the Activate Outlook protection button.
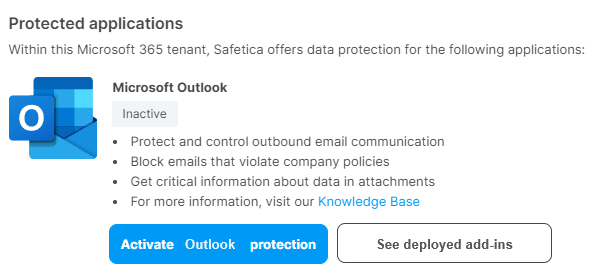
3. You will be shown a list of steps you must perform to enable Outlook protection.
4. Check the box and click Finish. Then proceed to distribute and deploy the Outlook add-in.
❗Completing the configuration in the Microsoft 365 admin center is a crucial prerequisite for the correct operation of this feature.
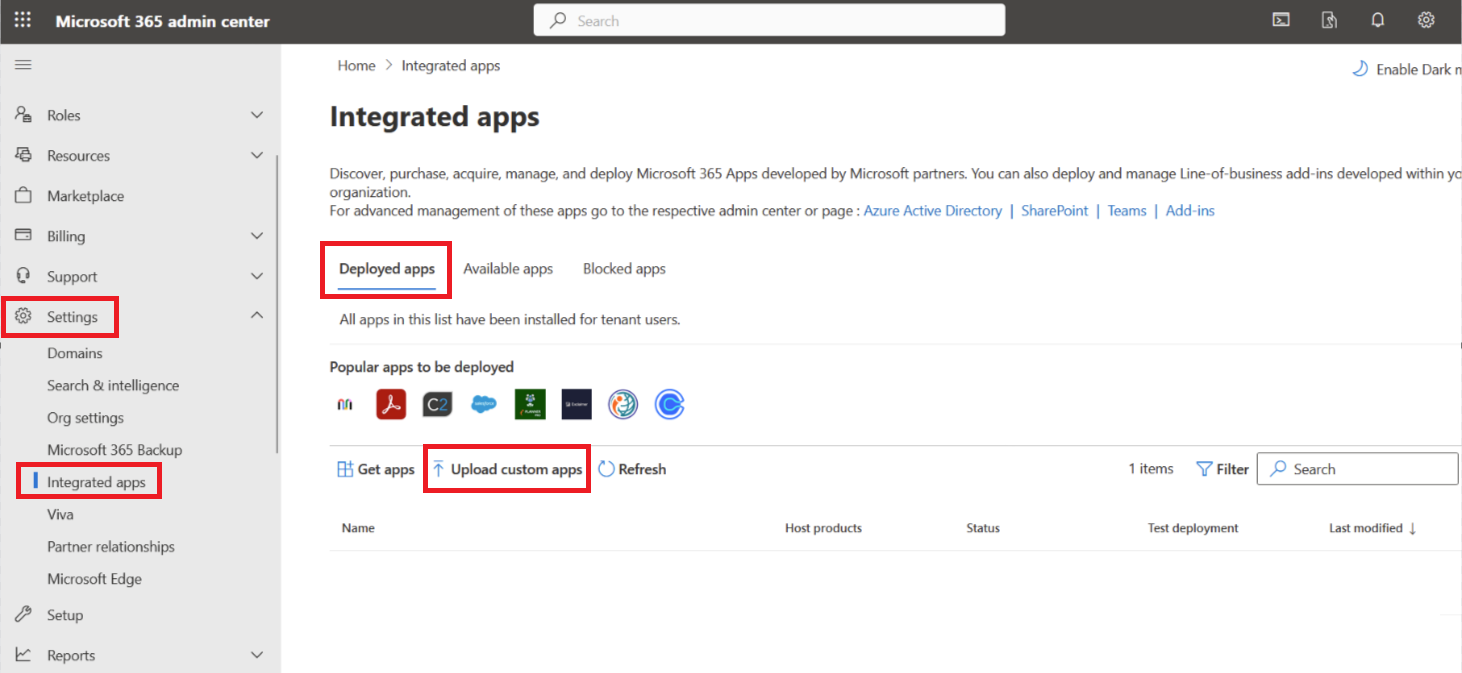
How to distribute and deploy the Outlook add-in in your company
Deploying the Outlook add-in means you're pre-installing it for a specific set of users in your company. To deploy the add-in:
- Go to Microsoft 365 admin center.
- In the left navigation panel, click Settings > Integrated apps.
- In the Deployed Apps tab, click Upload custom apps to manually add the Outlook add-in.

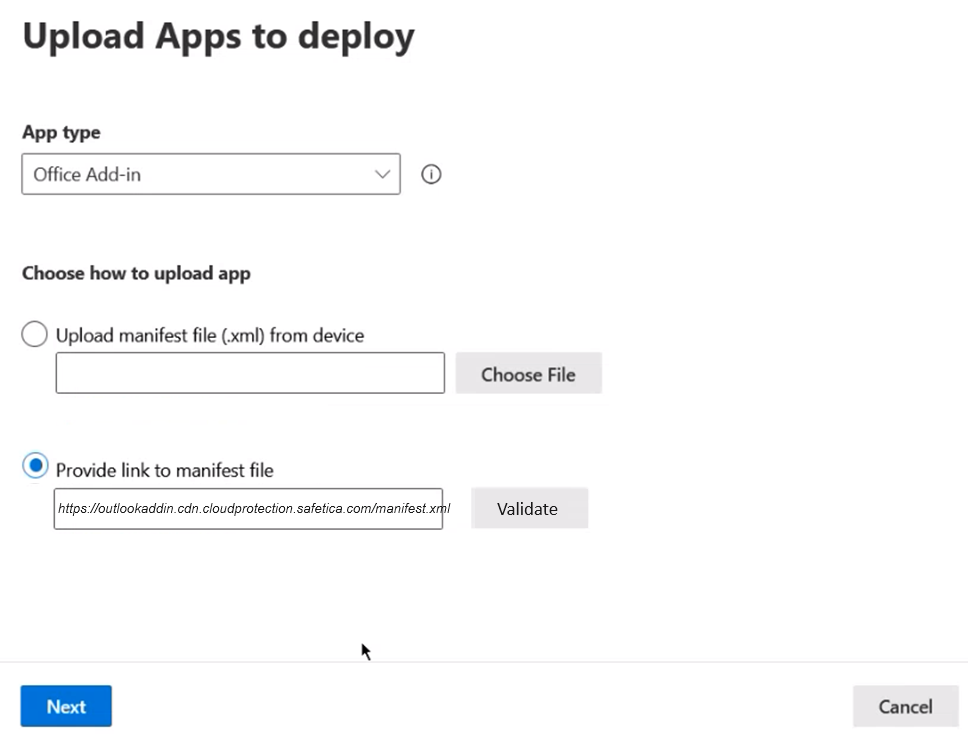
- In App type, choose Office Add-in.
- In Choose how to upload app, choose Provide link to manifest file, and enter this URL:
- If your data center is in the EU: https://outlookaddin.cdn.cloudprotection.safetica.com/manifest.xml
- If your data center is in the US: https://outlookaddin.cdn.us.cloudprotection.safetica.com/manifest.xml
6. After the manifest is uploaded, click Next.
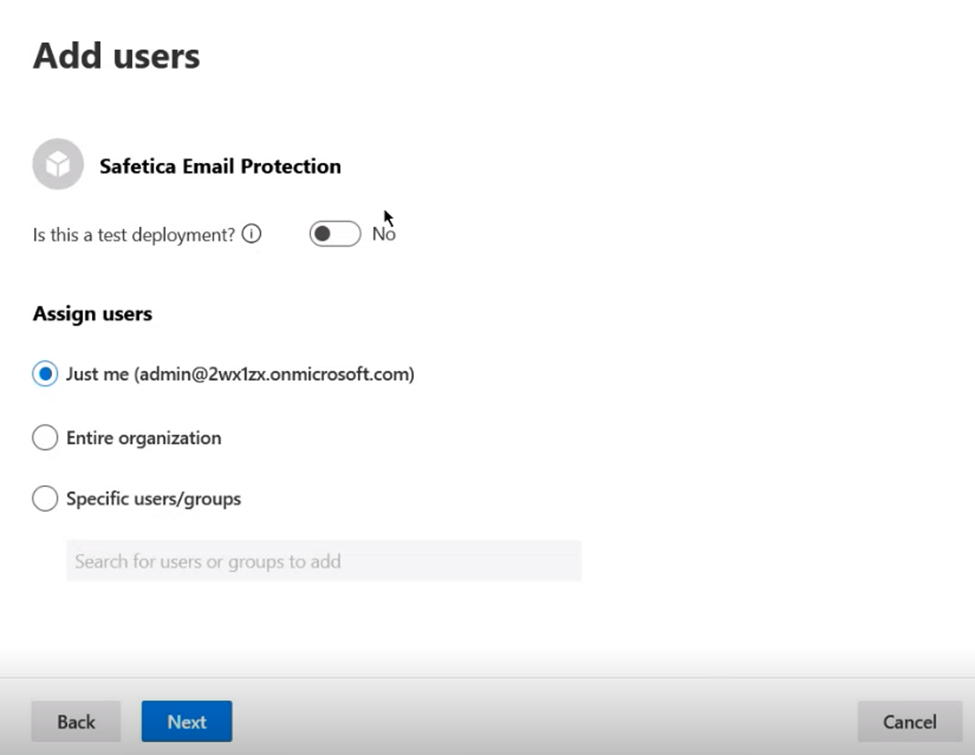
7. Select users to whom you want to deploy the add-in (you can choose Entire organization, Specific users/groups, or Just me). Specific users/groups can be a Microsoft 365 group, a security group, or a distributed group.
8. You can choose Test deployment if you want to wait to deploy the app to the entire organization. Click Next.
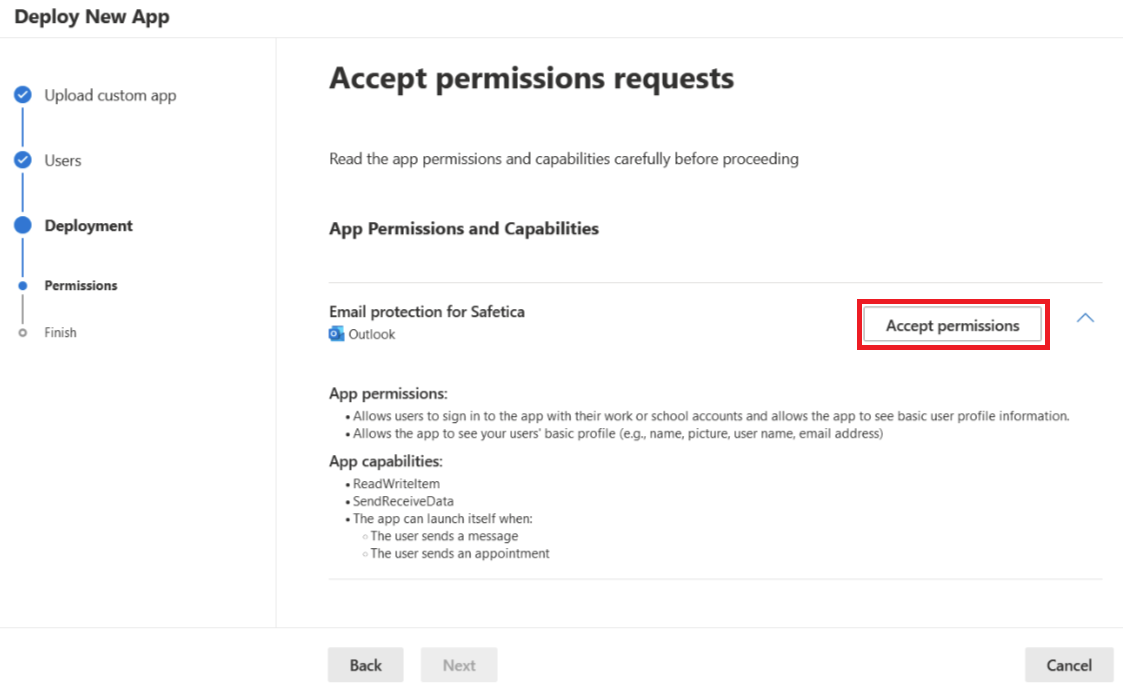
9. Review the list of the add-in’s permissions and confirm them (e.g., responding to sending an email, reading the name and email address of the user working in Outlook, etc.). Click Next.
10. Review the deployment and click Finish deployment.
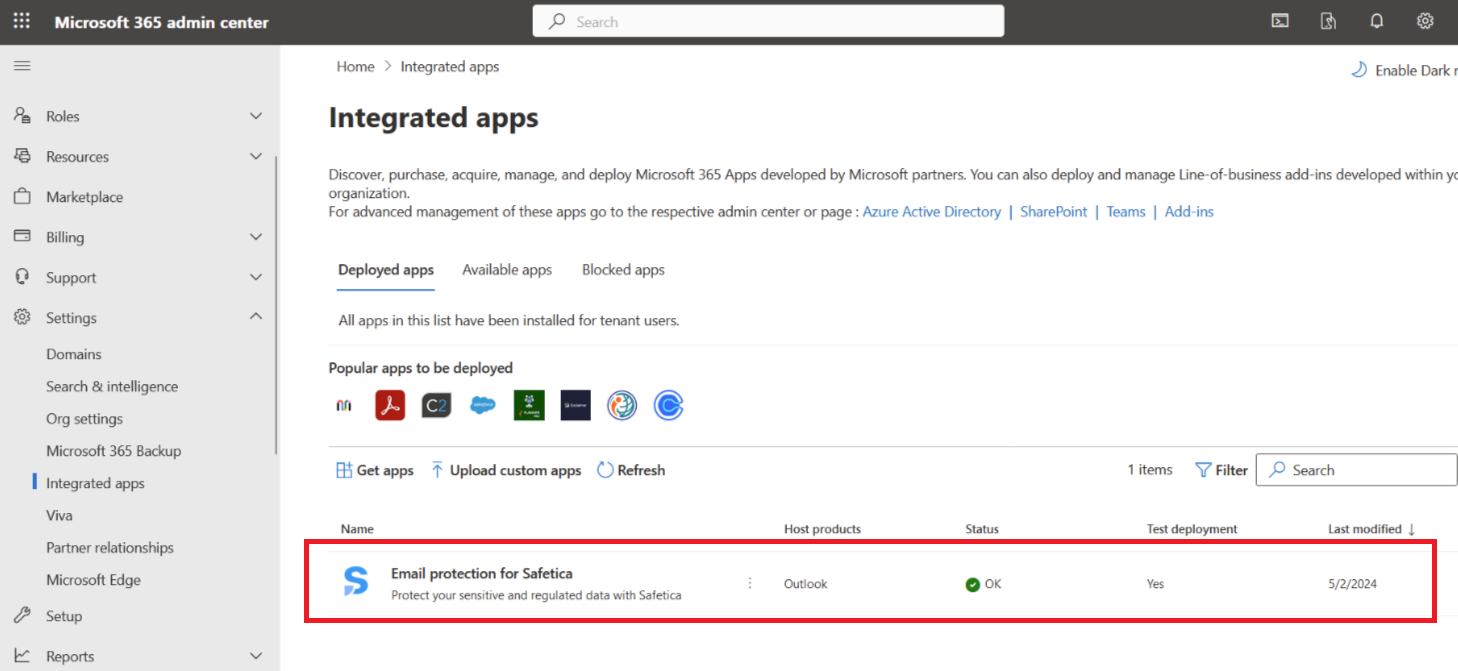
11. You will then see the Outlook add-in (named Email protection for Safetica) in the list of custom add-ins.
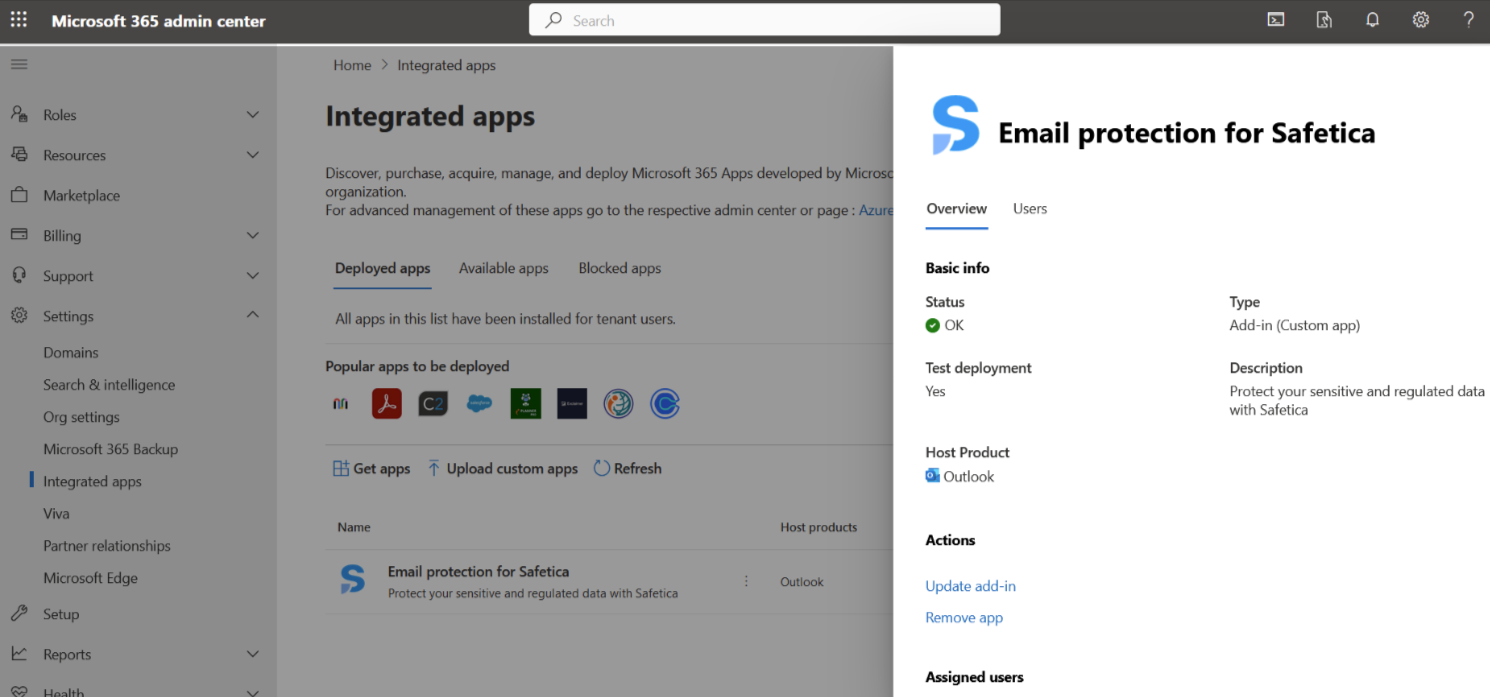
12. When you click the Outlook add-in, you will see its details. Here, you can update or remove the add-in, or make further changes.
✍️Learn where to find a transparent overview of your active add-ins here.
❗The deployment of Outlook add-in may take some time (sometimes even a few days) based on the speed of Microsoft deployment process.
How to update the Outlook add-in
You should update the add-in when a new manifest.xml is available.
To update the Outlook add-in:
- Go to Microsoft 365 admin center.
- In the left navigation panel, click Settings > Integrated apps.
- In the Deployed Apps tab, click the Outlook add-in (named Email protection for Safetica).
- Click Update add-in.

5. In Choose how to upload app, choose Provide link to manifest file, and enter this URL:
-
- If your data center is in the EU: https://outlookaddin.cdn.cloudprotection.safetica.com/manifest.xml
- If your data center is in the US: https://outlookaddin.cdn.us.cloudprotection.safetica.com/manifest.xml
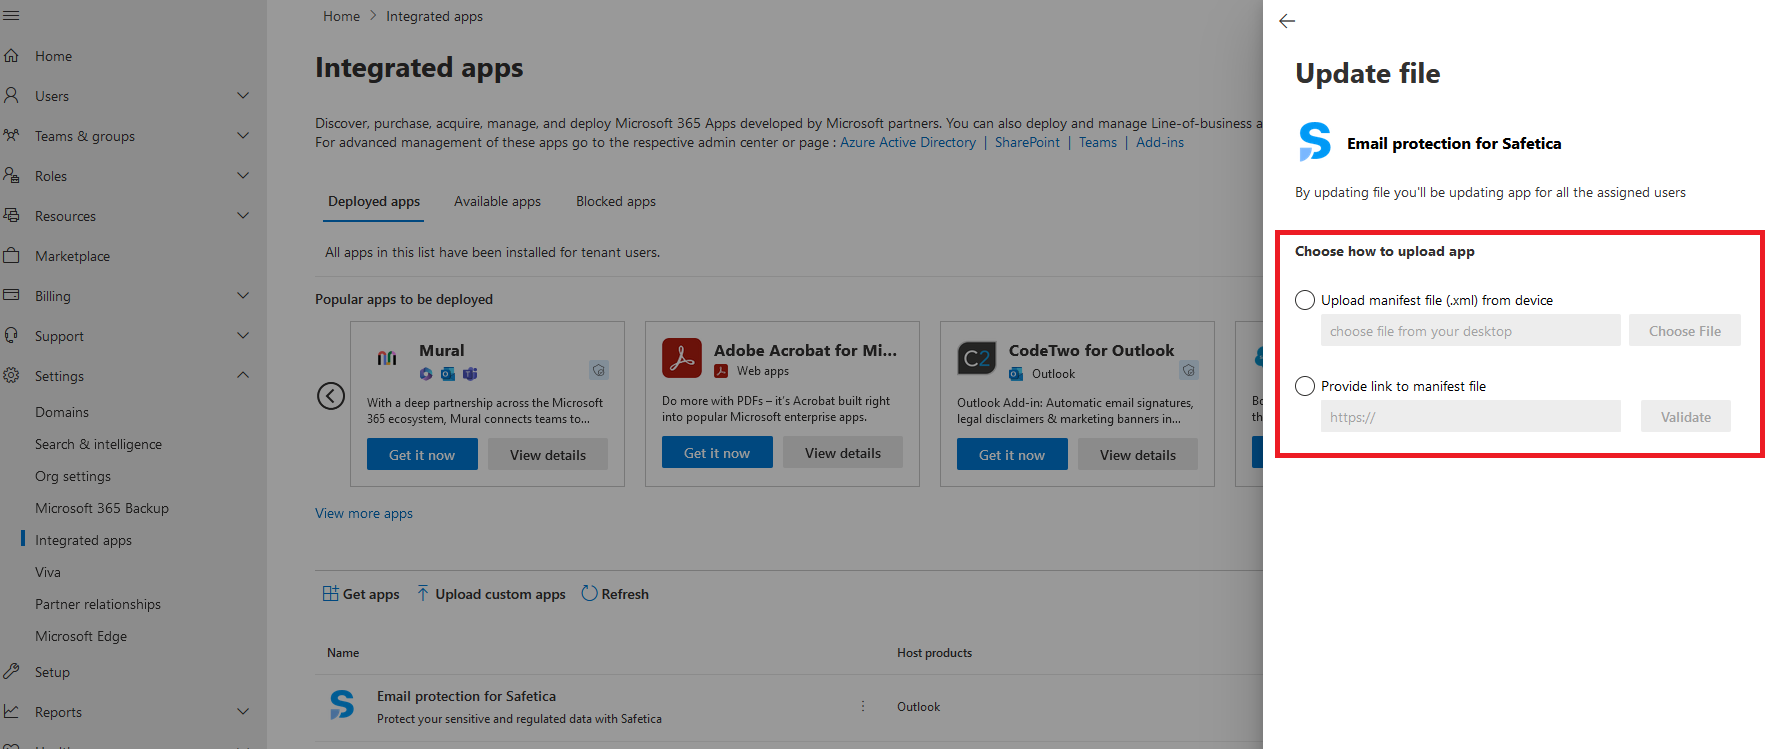
6. After the manifest is uploaded, click Next.
7. Review the list of the add-in’s permissions and click Accept and update.
How to deactivate Outlook protection
You must deactivate Outlook protection in the following order:
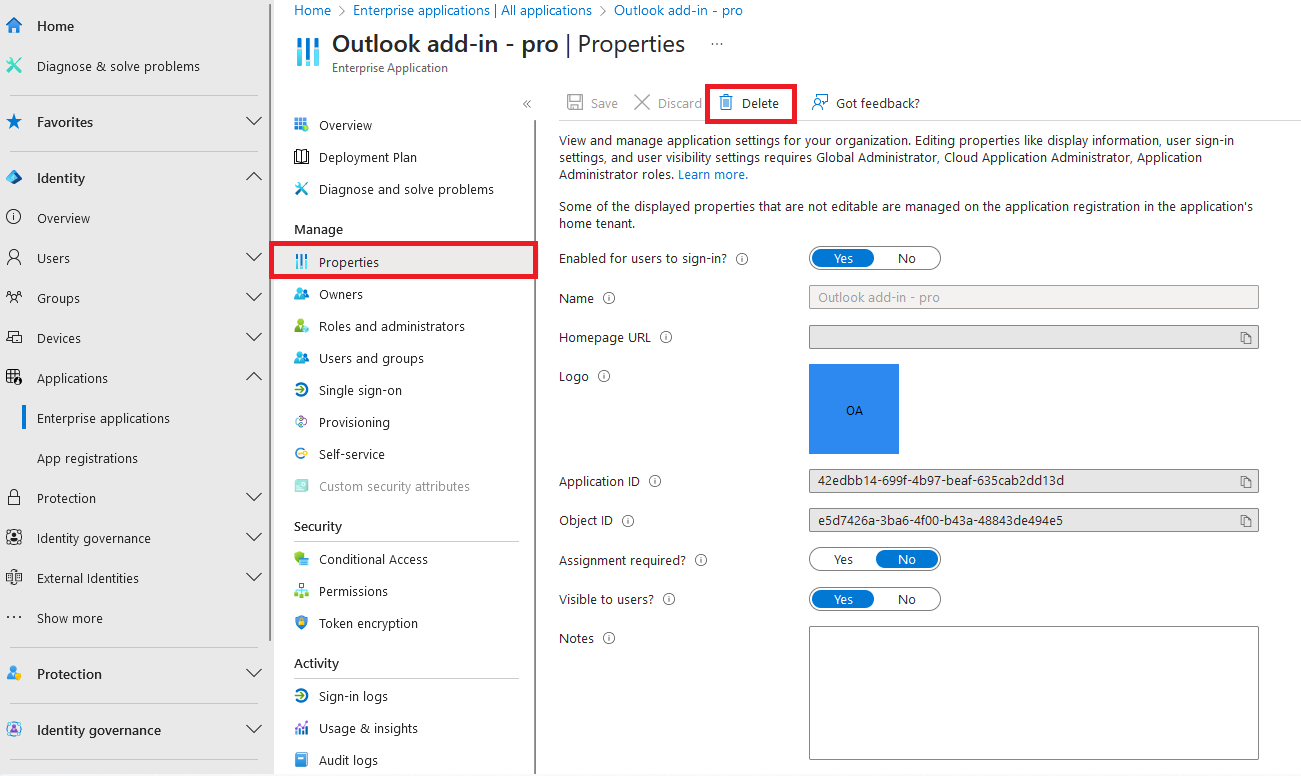
1. Delete the Outlook add-in from Microsoft Entra admin center:
- Go to Microsoft Entra admin center.
- In the left navigation panel, click Applications > Enterprise applications.
- Find the Outlook add-in - pro app and click to open it.
❗There are two Safetica apps. Please only work with the Outlook add-in - pro app.
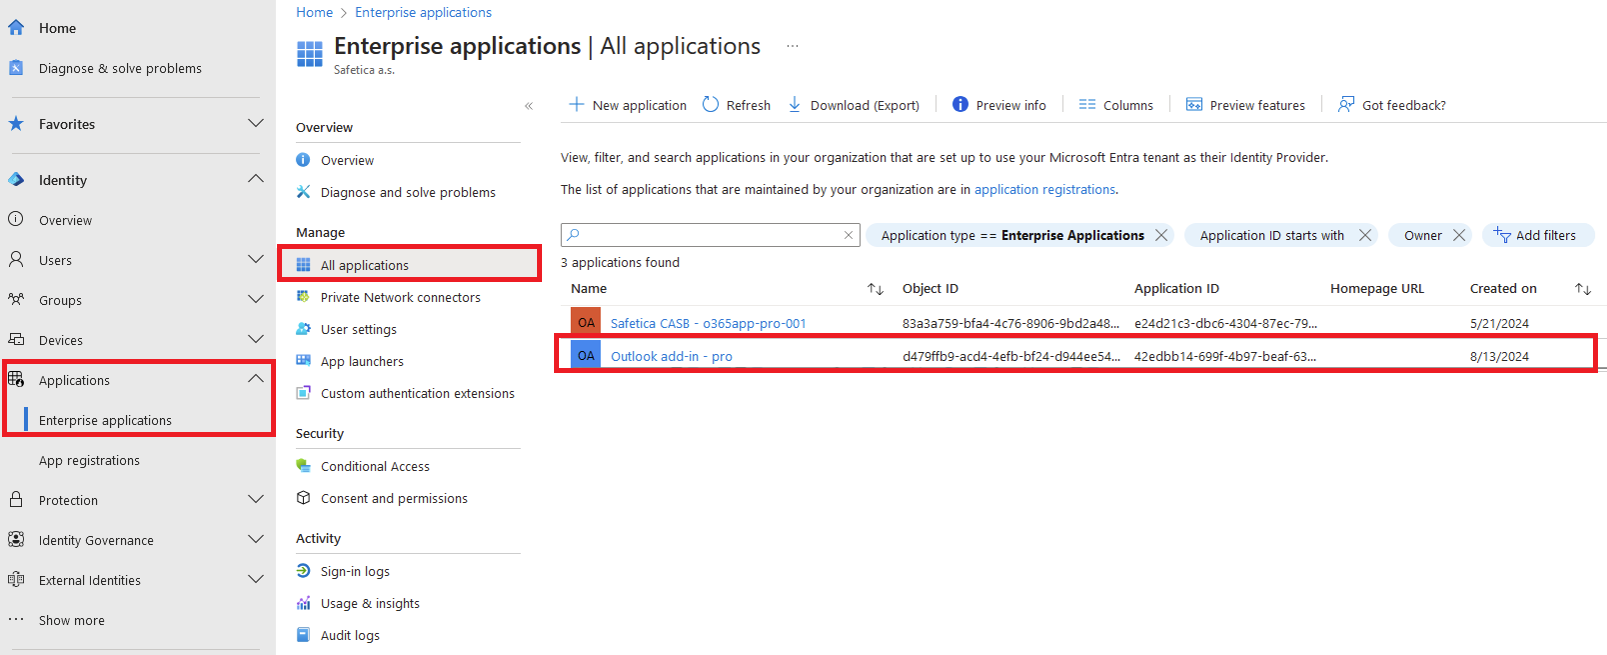
- In Outlook add-in - pro app, click Properties and then Delete the app.

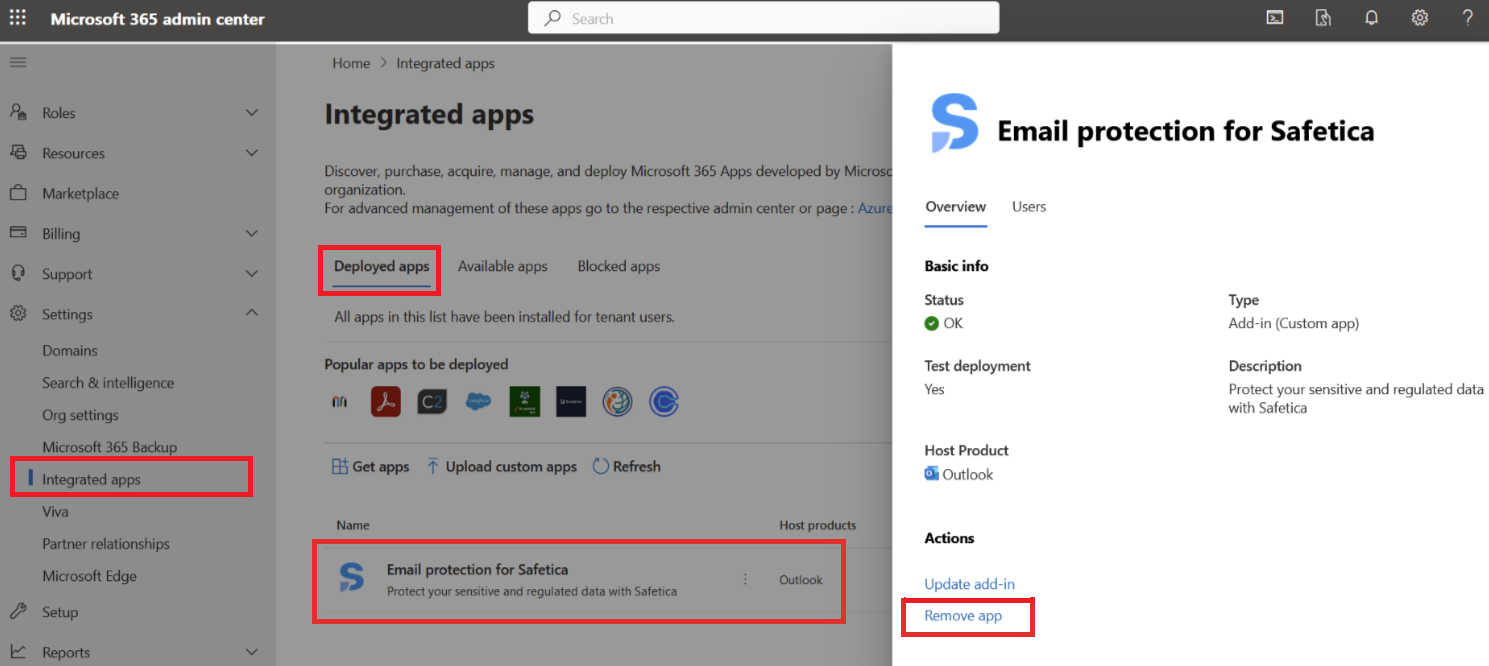
2. Remove the Outlook add-in from Microsoft 365 admin center:
- Go to Microsoft 365 admin center.
- In the left navigation panel, click Settings > Integrated apps.
- In the Deployed Apps tab, click the Outlook add-in (named Email protection for Safetica).
- ClickRemove app.

3. Deactivate Outlook protection in Safetica console:
- In Safetica console, go to Cloud services > your M365 tenant.
- Click Deactivate Outlook protection.

Troubleshooting
Issue: Error when updating the Outlook add-in
When attempting to update the Outlook add-in, you may encounter an error message.
Solution: Do not update the Outlook add-in, it is already up to date.
This update error may be caused by attempting to link the same manifest version that you are already using.
If you receive the above-mentioned error message during update, you are probably already using the latest version, and no update is available.
Issue: Error when migrating from an EU data center to a US data center (or vice versa)
When you are migrating between data centers and you try to update the EU manifest with the US manifest (or vice versa), you may encounter an error message.
Solution: Deactivate Outlook protection.
When migrating between data centers, you must deactivate Outlook protection, including the Outlook add-in. Once the migration is complete, you can activate Outlook protection again. Learn more about migrating between data centers here.
Read next
Outlook protection: Block (with override) in Outlook
Exchange protection: How to activate and deactivate it
SharePoint protection: How to activate and deactivate it
SharePoint protection: How to protect file sharing
How to add your Microsoft 365 tenant