📝 Note: Information in this article applies to Safetica ONE 10 or older.
To understand how this integration works, please visit article Introducing Safetica CASB for data protection in Microsoft 365.
The activation process has two parts:
A) Activation of the integration in Safetica Management Console
B) Exchange Online configuration in Microsoft Exchange admin center
⚠️ Caution: Respect the order of steps outlined in this guide. Creating the connector before activating the integration in Safetica Management Console will result in technical issues with processing of your mail traffic.
A) Activation of the integration in Safetica Management Console
- In Safetica Management Console go to Maintenance > Integration settings > Office 365 integration.
- In section E-mail (Exchange online), activate options Audit and log Office 365 e-mail and Switch to new Office 365 integration.
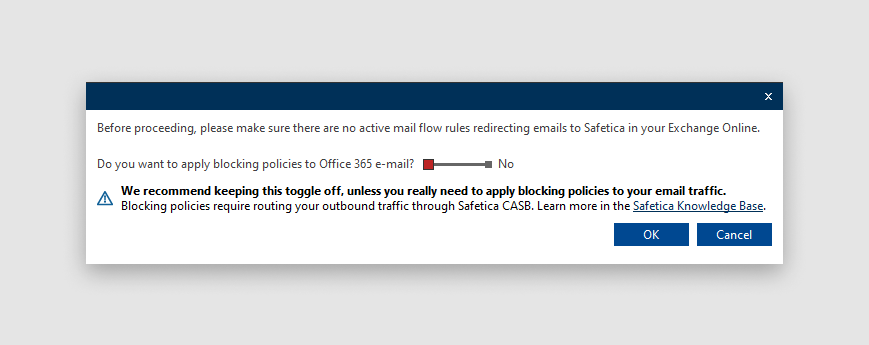
- When saving, confirm the pop-up, but keep the option to apply blocking policies set on value No.

- You will be asked to sign into your Azure tenant with account that has Global Admin role and agree with providing following permissions. Do not close the Management Console yet.
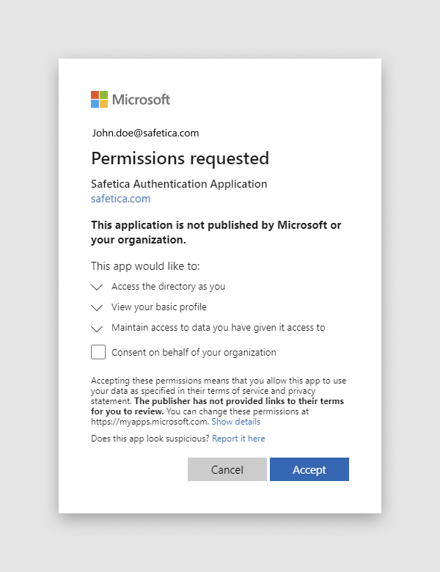
Safetica needs these permissions for the following purposes
- User.Read.All (Read all users' full profiles) - to download user list from Azure Active Directory and to show the user name in each log in Safetica Management Console
- ActivityFeed.Read (Read activity data for your organization) - to download logs originating in Microsoft OneDrive and SharePoint.
- Files.ReadWrite.All - to download files that are shared for DLP evaluation. In the future also to cancel sharing operations that violate configured policies.
- At this point, Safetica creates an app registration for synchronizing the Azure Active Directory user list and email domains.
📝 Note: Safetica does not have ability to store or read your O365 admin credentials.
How to grant only select permissions to Safetica CASB
To grant only selected permissions for a specific functionality to Safetica CASB, you can:
- Contact Safetica Support to enable advanced configuration flow in Safetica Management Console.
- Enable Safetica CASB in Safetica Management Console as usual. The step where you consent to application permissions will be skipped.
- Download and run this configuration script in your PowerShell session:
- To enable permissions for Email Protection, run .\SafeticaCasb-AddPermission.ps1 -PermissionSet Email
- To enable permissions for SharePoint Protection, run .\SafeticaCasb-AddPermission.ps1 -PermissionSet SharePoint
Permission sets
The configuration script adds the following permissions to Safetica service principal in your M365 tenant:
Email Protection: User.Read.All
SharePoint Protection: User.Read.All, ActivityFeed.Read, Files.ReadWrite.All
B) Exchange Online configuration in Microsoft Exchange admin center
📝 Note: Make sure you have successfully completed all previous steps before proceeding with next part, otherwise you are risking disruption of your mail traffic.
Mail Flow Rule configuration
You can configure the mail flow rule either:
- automatically via our configuration script (recommended) or
- manually in Microsoft Exchange admin center.
How to configure the mail flow rule automatically via configuration script
1. Download this configuration script.
2. Run the script.
3. Afterward, all information about sent emails should become available in Safetica ONE 11 within a few minutes.
How to configure the mail flow rule manually in Microsoft Exchange admin center
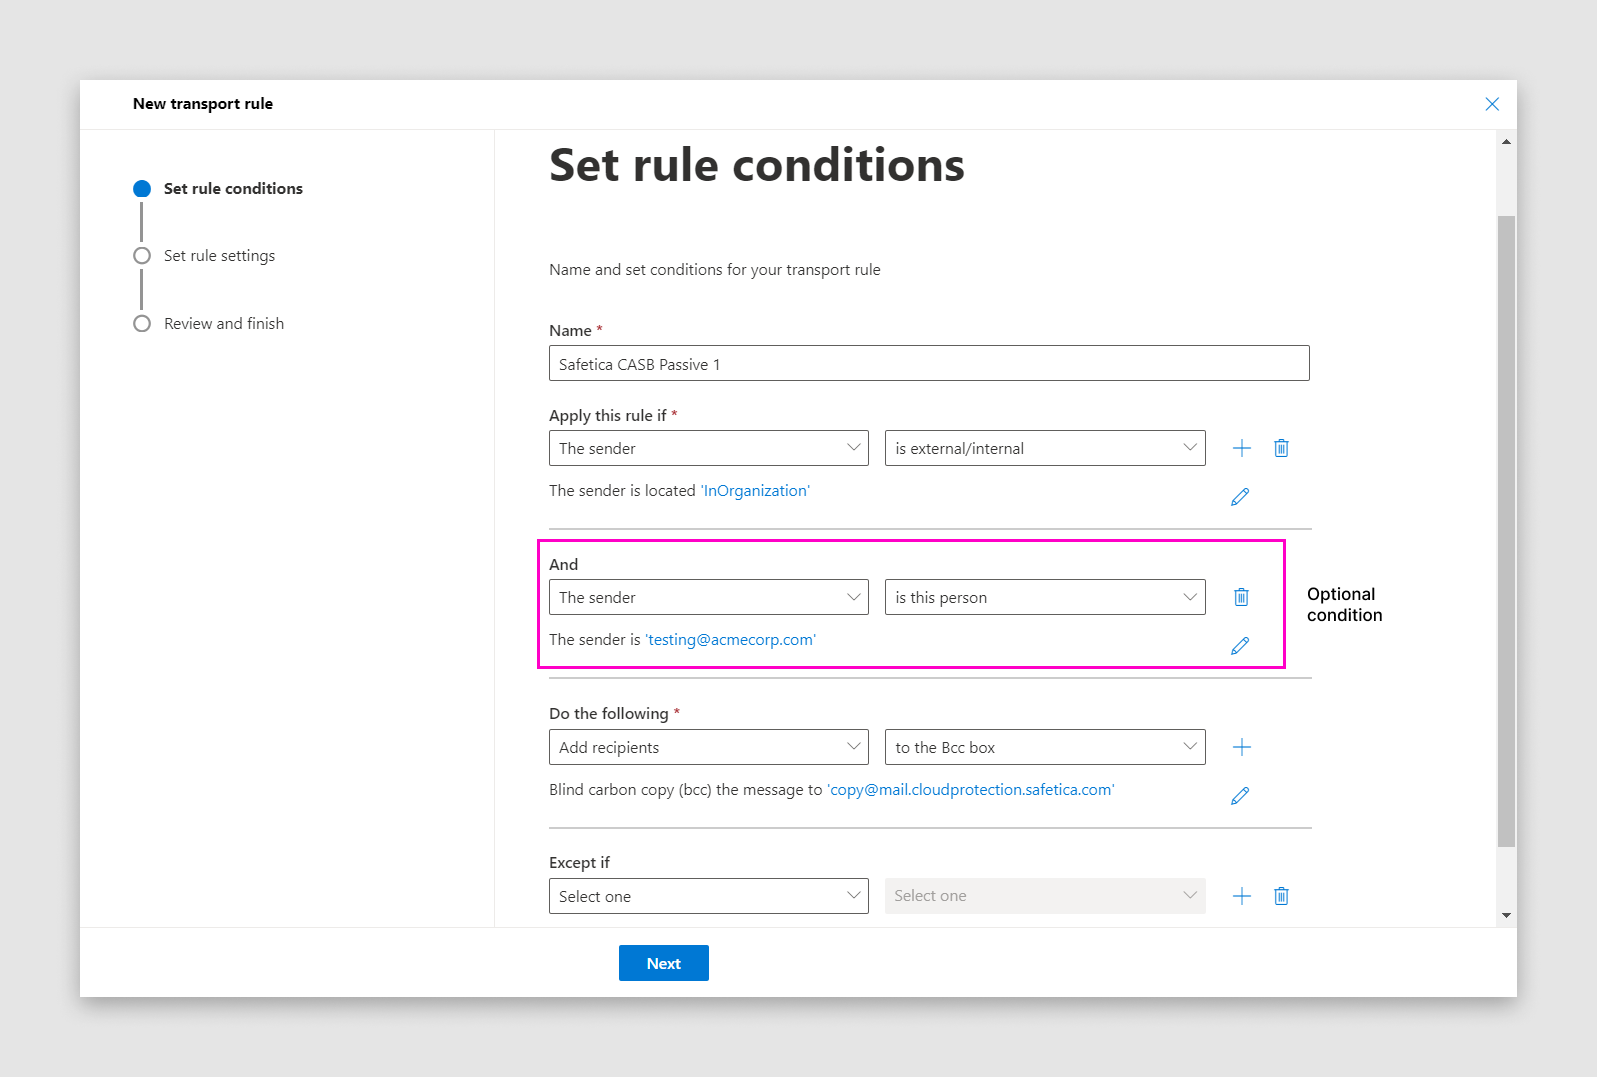
- Go to Exchange admin center > Mail Flow > Rules > Add a rule > Create a new rule
- Choose appropriate name for this rule (e.g. Safetica CASB).
In Apply this rule if... choose The sender is external/internal and Inside the organization.
It is highly recommended to test the activation process on limited set of users first, before proceeding with company-wide deployment. You can do that by setting up extra condition in this step. Once you set value Sender is external/internal and Inside the organization, add an extra condition by clicking on the plus sign. Then set up extra condition specifying The sender is this person.
In Do the following select Add recipients to the Bcc box and select copy@audit.cloudprotection.safetica.com - On next step of this wizard (Set rule settings), select Match sender address in message envelope.
- Save the rule. We recommend you place your new rule at the top of the rule list.
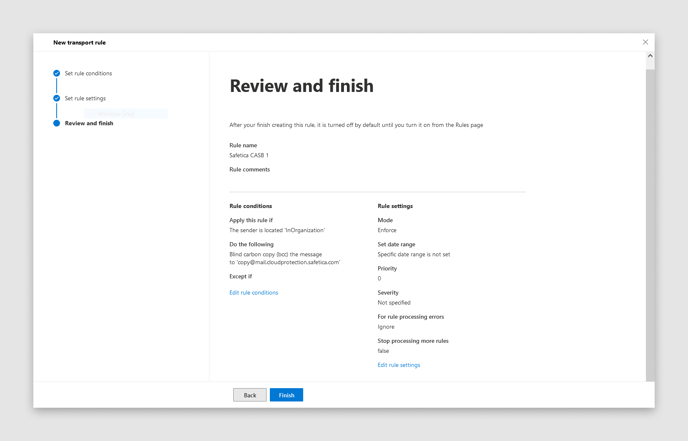
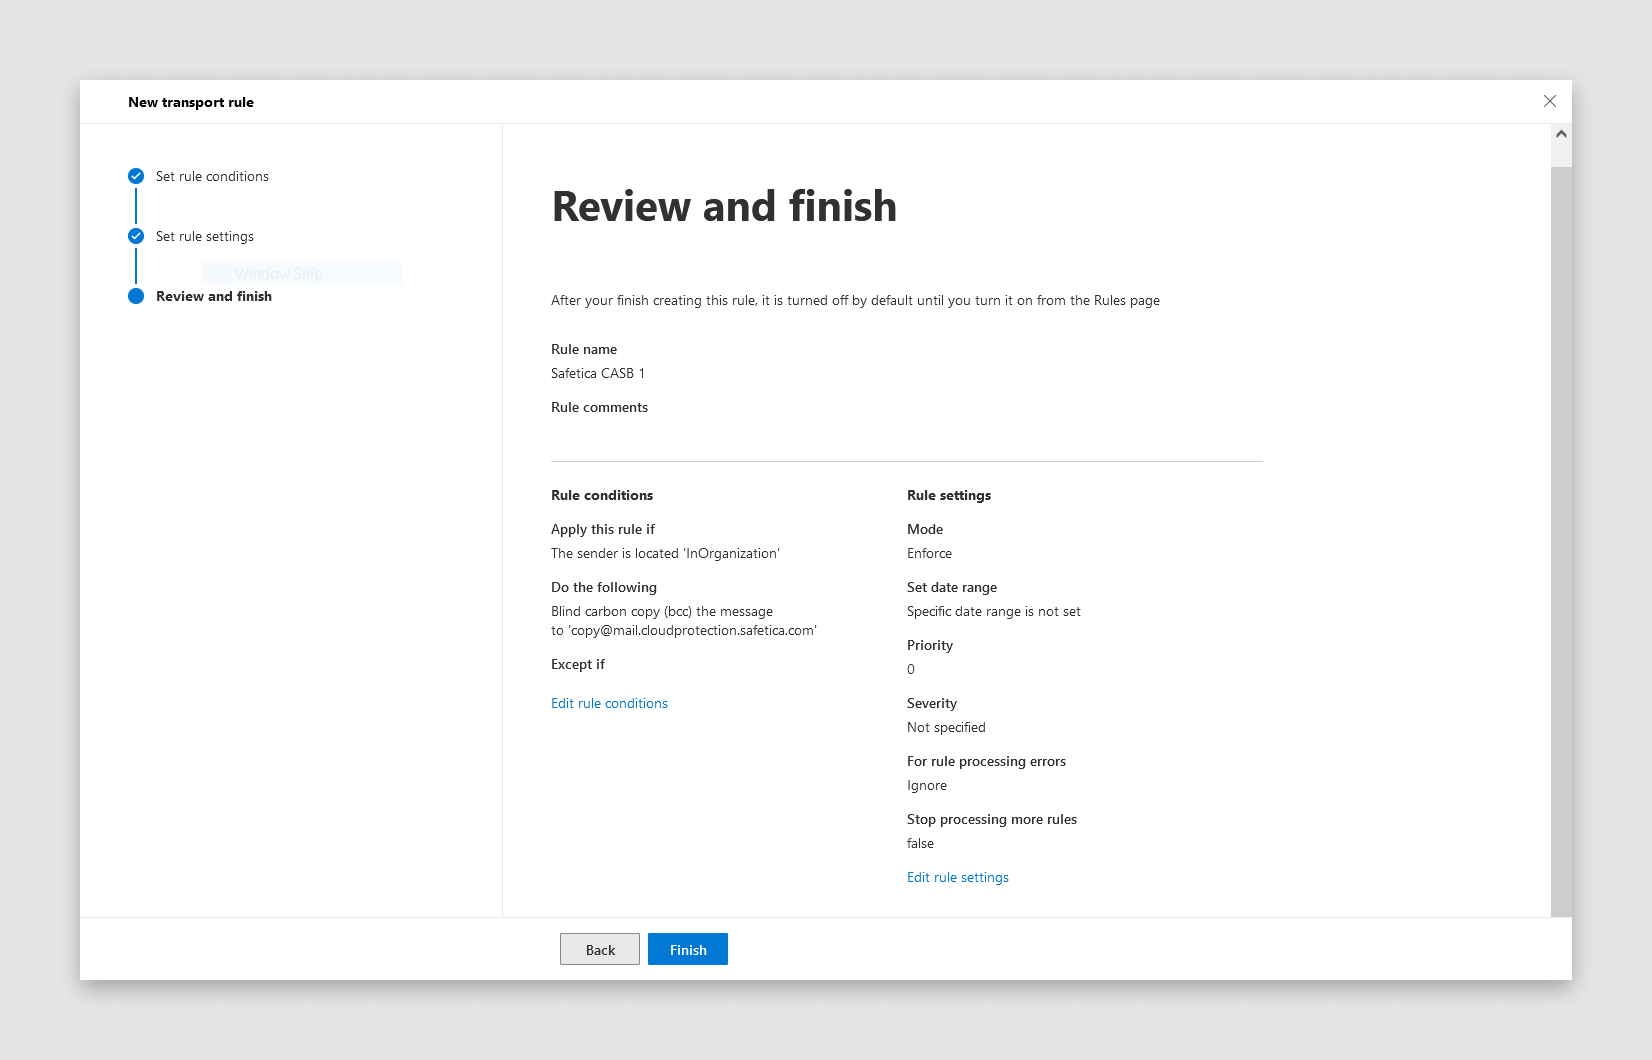
📝 Note: Make sure that you set the status of the maiflow rule to Active. By default, all new rules are created in inactive state
You have succeeded in setting up data protection for your Exchange Online using Safetica CASB!
Within minutes, all configured emails should be sent to Safetica CASB and DLP logs representing each such email should be visible in your Safetica Management Console.
How to safely disable the email data protection of Microsoft Exchange Online
If you want to deactivate the connection, you can do so by
- Opening Exchange admin center and setting the status of the mail flow rule to disabled. This will stop flow of emails to Safetica CASB.
- Navigating to Safetica Management Console and disabling the toggle Switch to new Office 365 integration
It is important to always start with deactivating the rule. Only after that it is safe to proceed with deactivation in Safetica Management Console.