Product plans: Premium | Enterprise | On-Prem (see: Limits by plan)
Introduction
User-applied tags let end users classify files manually with tags that admins create and manage in the Safetica console. By applying, changing, or removing a tag, users can influence how Safetica protects files (for example, whether screenshots are blocked when working in a file).
How it works
- The admin creates tags in the Safetica console, for example Public, Internal, or Classified. Learn more here.
- In policies for user-applied tags, the admin decides which users or teams can see and use each tag, and whether they can downgrade or remove tags. Learn more here.
- The admin adds tags as another element to a data classification. Learn more here.
- The admin links that data classification to a policy. Learn more here.
- End users apply tags to files via the right-click context menu (both on devices with Windows and macOS). Learn more here.
- Files tagged by users are protected by any policies linked to those tags.
❗User-applied tags are applied only to files that contain at least 6 bytes of data. They are ignored for empty files and for files containing less than 6 bytes of data.
👤User point of view
What user-applied tags mean for users
Users for whom the admin enabled user-applied tags, can tag files directly from the right-click context menu on both Windows and macOS devices. Depending on what the admin allows, they can:
- Apply a tag to an untagged file
- Change a tag to a stricter one
- Downgrade a tag (only if enabled for the user)
- Remove a tag (only if enabled for the user)
✍️Users can only see tags and options that the admin has set for them in policies for user-applied tags in the Safetica console.
How can users tag files
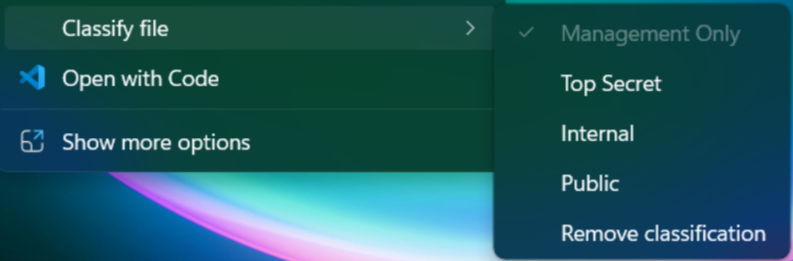
Apply tag to an untagged file
- Right-click the file they want to tag.
- Click Classify file.
- Choose one of the available tags (for example Internal or Classified).

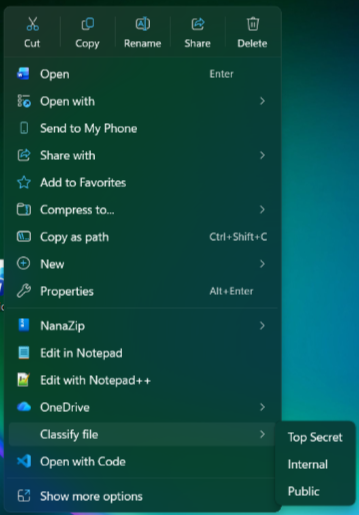
Figure 1: User-applied tags on Windows Figure 2: User-applied tags on macOS
✍️Result: Any policies linked to this tag will start applying to the file. If the admin linked the tag to a blocking policy, certain actions may be blocked.
For example: If the tag is linked to a policy that blocks screenshots, you may no longer be able to take screenshots when working in the tagged file.
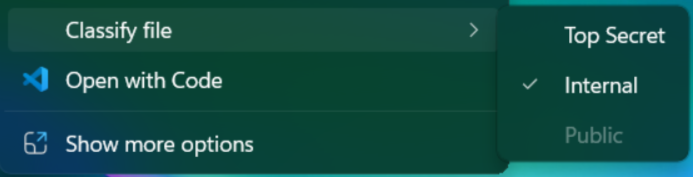
Change a tag to a stricter one
Normally, users can:
- Apply a tag to untagged files
- Change an existing tag to a stricter one (higher in the tag list).
Less strict tags are greyed out and can’t be selected.
✍️Result: When you change a tag to a stricter one, Safetica applies protections based on the new tag and restrictions may become stricter (depending on the linked policy).
For example: You may no longer be able to take screenshots and saved changes made in the tagged file.
Downgrade a tag (only if enabled for the user)
If enabled by the admin, users can replace the current tag with a less strict one (lower in the tag list – for example from Internal to Public).
✍️Result: When you downgrade a tag, Safetica applies protections based on the new tag and restrictions may become less strict (depending on the linked policy).
For example: saving changes will be possible again, but taking screenshots will still be blocked.
Remove a tag (only if enabled for the user)
If enabled by the admin, users will see the option Remove classification in the Classify file menu. This allows them to completely remove the current tag from a file.
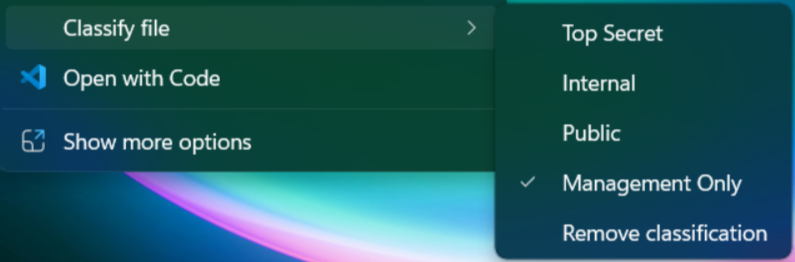
✍️Result: Removing a tag makes the file no longer tagged, so Safetica will stop applying restrictions based on user-applied tags (restrictions from other policies may still apply).
For example: Taking screenshots and saving changes will both be possible again.
Options that the user may or may not have
- Downgrade ability: To allow downgrading tags, the admin must enable the option Users can downgrade to less strict tags for the user in the user-applied tags policy. Less strict tags will be grayed out for users who do not have this option enabled.
- Remove classification option: To allow removing tags, the admin must enable the option Users can remove tags from files for the user in the user-applied tags policy. The Remove classification option is not visible for users who do not have this option enabled.
👨💻Admin point of view
What user-applied tags mean for admins
Admins can create user-applied tags, use them in data classifications, and then link those classifications to policies that protect sensitive files.
In Safetica console, admins can control:
- Which tags are available.
- Which users or teams can see and use each tag.
- Who can downgrade a tag to a less strict one.
- Who can remove tags from files.
- How tags are used in data classifications and policies to protect files.
How to create user-applied tags
-
Go to Data classification.
-
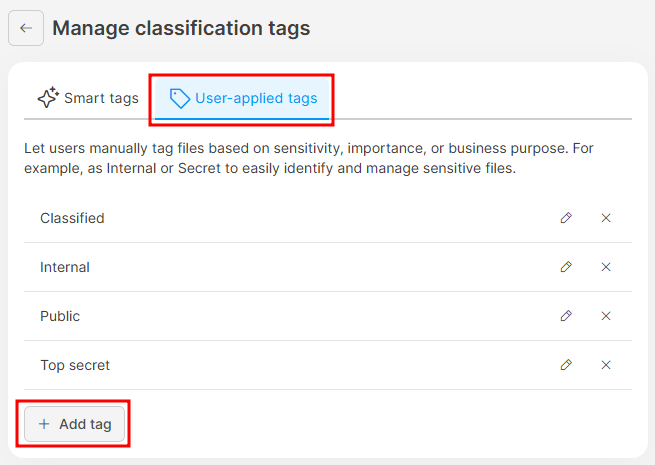
Click Settings and select Manage classification tags.

-
Select the User-applied tags tab.
-
Click Add tag.
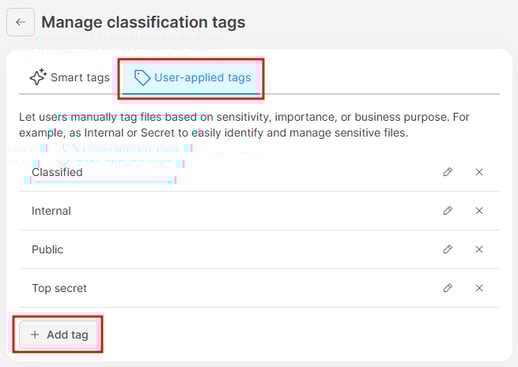
- Enter the Name and Description.
- Save the tag.

Created tags will be available in:
- Policies for user-applied tags, where you decide who can use each tag.
- Data classifications, where you decide which tags belong to each classification.
How to edit user-applied tags
-
Go to Data classification.
-
Click Settings and select Manage classification tags.
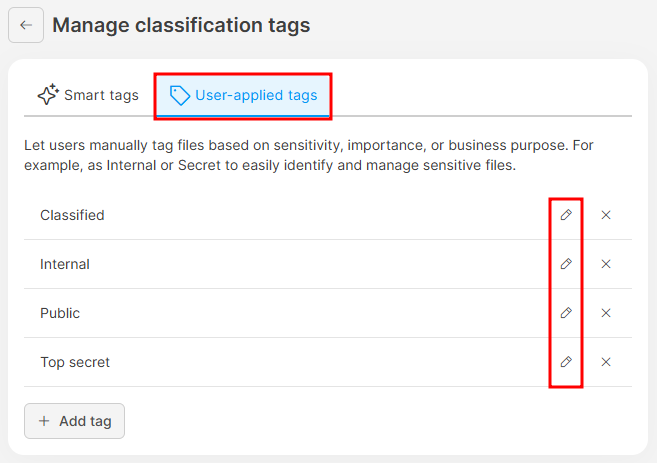
- Select the User-applied tags tab.
- Click the Edit icon, update the Name or Description.
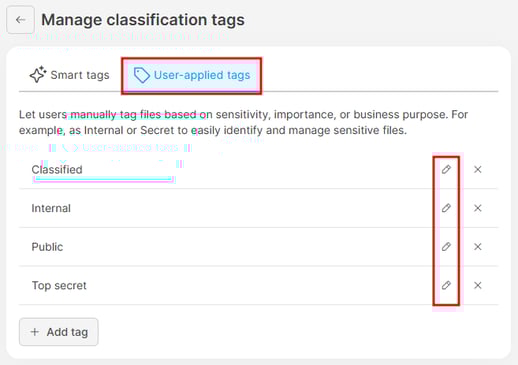
- Save the changes.
How to delete user-applied tags
-
Go to Data classification.
-
Click Settings and select Manage classification tags.
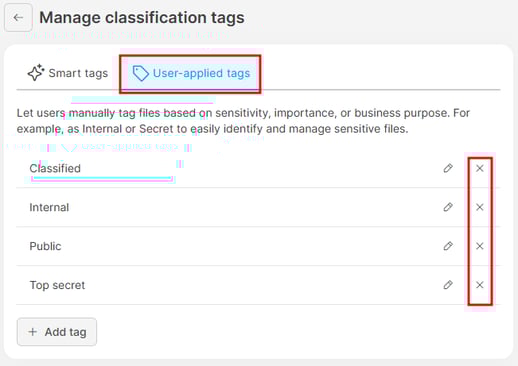
- Open the User-applied tags tab.
- Click the Delete icon next to the tag you want to delete.
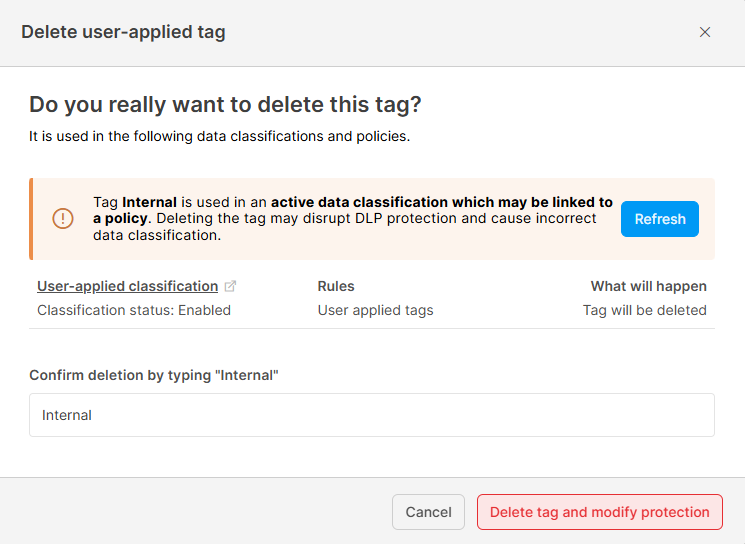
- Review the impact before deletion: Safetica shows a list of all data classifications and policies that depend on the selected tag (if there are any). You can review:

- Data classifications that use the tag (including the specific rules the tag is used in).
- Policies that are affected (including the users or teams the policy applies to).
- Status of each classification or policy (Enabled or Disabled).
- What will happen when you delete the tag:
- If a rule contains multiple tags → Only the selected tag will be deleted.
- If the rule contains only this tag → The tag and the entire rule will be deleted.
- Choose how to delete the tag: You can delete the tag in one of two ways:
- Option 1: Automatic deletion:
- Click the Delete tag and modify protection button.
- Safetica automatically updates all affected classifications and policies.
- Option 2: Manual deletion:
- Click the affected data classifications to open them in a new tab.
- Manually delete the tag from those classifications.
- Return to the deletion dialog.
- Click Refresh to re-check dependencies.
- Click Delete tag and modify protection to complete the process.
- Option 1: Automatic deletion:

✍️When an admin deletes a tag in the Safetica console, the tag is not removed from files that already have it:
-
Files that were previously tagged will keep the tag.
-
Users will no longer be able to apply this tag to new files.
-
The tag will appear grayed out in the context menu.
- Safetica will no longer process the tag.
How to enable user-applied tags for selected users or teams
You control who can see and use each tag via policies for user-applied tags.
- Go to Policies > User-applied tags tab.

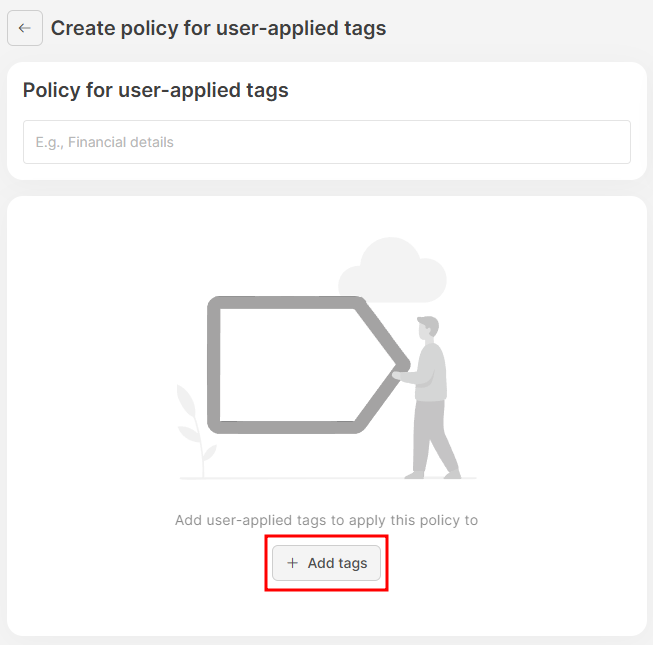
- Click Add policy.
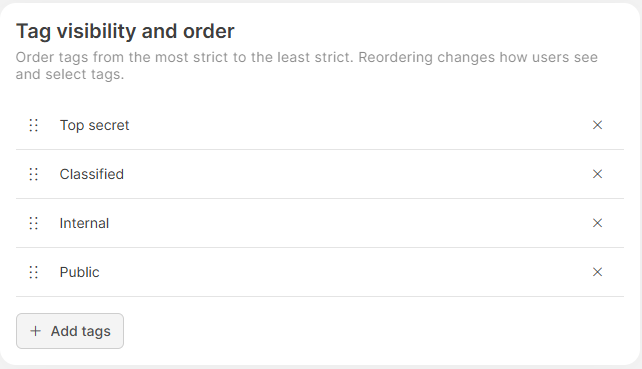
- Click Add tags and select one or more tags.

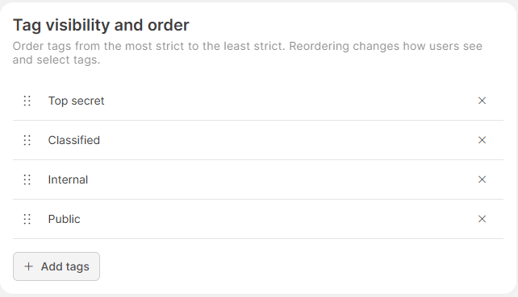
- Order the tags: Tag order defines which tags are considered stricter or less strict, how users see the tags, and how they select them. Drag and drop the tags to change their order.
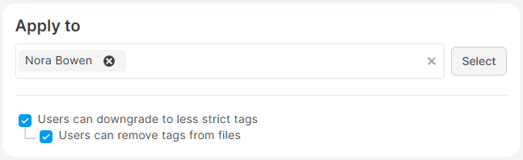
- In Apply to, you can:

-
- Add users or teams that should see and use the tags.
- Decide what these users can do with the tags, such as whether they can downgrade to less strict tags or completely remove tags from files. Learn more about these options below.
Users will only see the tags and options that are allowed for them.
How to allow users to downgrade or remove tags
In policies for user-applied tags, you also control what users can do with tags that are already applied to files.
- Go to Policies > User-applied tags tab.
- Click the existing policy to edit it or create a new one.
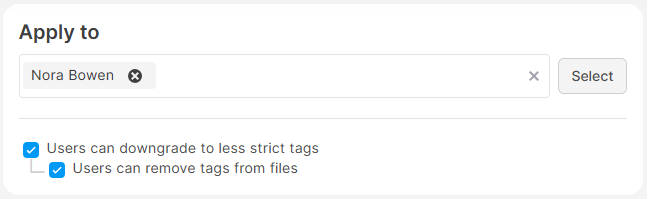
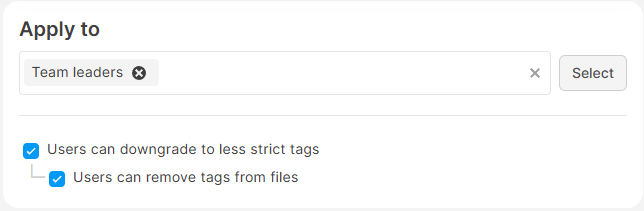
- In the Apply to section, select what users can do:
- Users can downgrade to less strict tags
- Users can remove tags from files.
✍️“Downgrade” means replacing a tag with another tag that represents lower sensitivity. In the tag list, stricter tags are higher, and less strict tags are lower.
Behavior for each option:
- If no option is selected: Users can apply the tag to untagged files or change the tag to a stricter one (higher in the tag list – for example from Internal to Classified).
- Users can downgrade to less strict tags: Users can change the applied tag to a less strict one (lower in the tag list – for example from Internal to Public).
- Users can remove tags from files: Users can remove the tag from the file completely (for example, remove the tag Internal, so the file is no longer tagged).
Example tag setup in a company:
- Regular employees:
- Can apply Public or Internal tags.
- Cannot downgrade or remove tags.
- Management:
- Can apply Public, Internal, or Classified tags.
- Cannot downgrade or remove tags.
- CISO:
- Can apply Public, Internal, Classified, or Top secret tags.
- Can downgrade and remove tags.
How to add tags to a data classification
To protect tagged files, first add tags to a data classification:
- Go to the Data classifications section.
- Create a new data classification or edit an existing one.
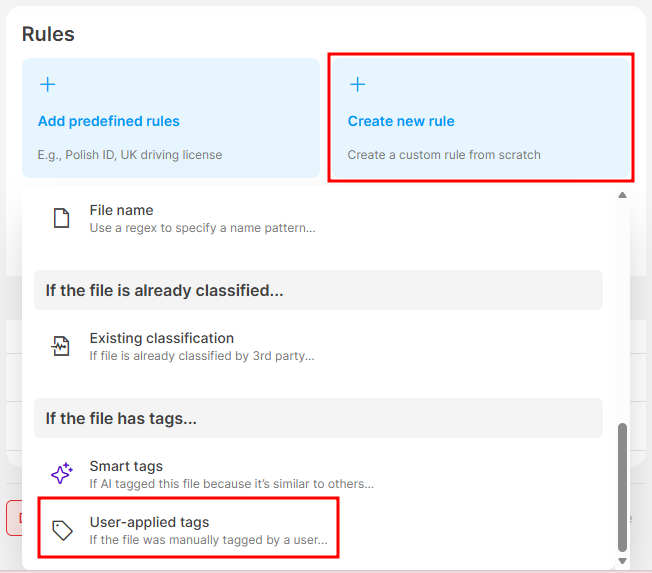
- In Rules, click Create new rule.
- In If the file has tags…, select User-applied tags.
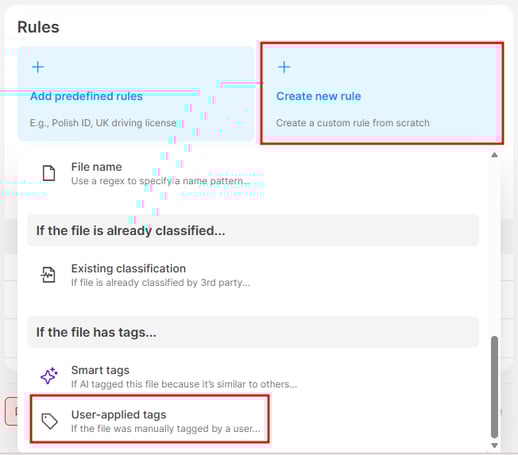
- Add one or more existing user-applied tags to the classification.

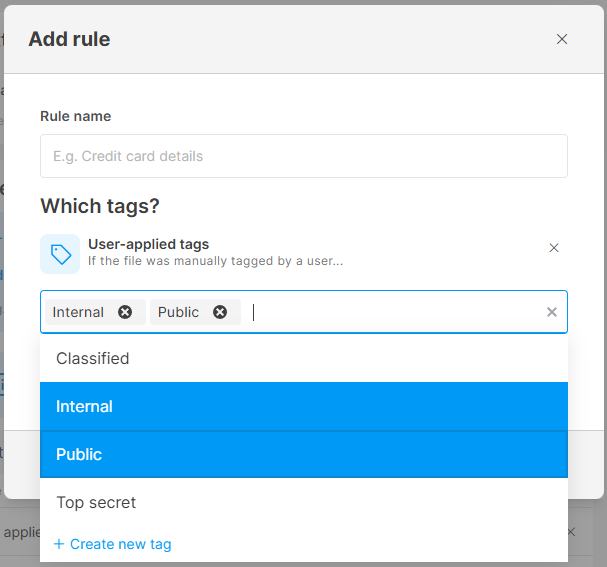
Any file with one of these tags will now match this data classification.
✍️Learn more about data classification elements here.
How to link the data classification with tags to a policy
You can now use this data classification in your policies.
✍️Learn how to link a data classification to a policy here.
Example: Block screenshots for files tagged Internal or Confidential
- Create Public, Internal, or Classified tags.
- In policies for user-applied tags, set:
- Everyone can use Public and Internal.
- Only selected users can use Classified and downgrade or remove it.
- Create a data classification that includes tags Internal and Classified .
- Link this classification to a policy that blocks screenshots (In the policy, set Screen capturing under Destination types to Block).
Result: Users cannot take screenshots of files tagged as Internal or Classified.
Where to see applied tags and related activity
See which tags users applied to files

To find out which tags users applied and how they worked with them:
- Go to the Data section in Safetica console.
- In the Classification tags column, you can see which tags are applied to each file.
- In the Operation context column, you can see what action the user performed with the tags, for example:
-
- Applied a tag
- Upgraded a tag
- Downgraded a tag
- Removed a tag
You can filter records by these actions to narrow down the results.
Example: Show all blocked operations related to tagged files
To display only blocked operations involving tagged files:
- Add the filter Policy action → Block
- Add the filter Classification tags → Has any value

See tag details for a specific file
To view detailed tag information for a specific file:
- Go to the Data section in Safetica console.
- Click the file to open its detail.
- Open the Classification tab.
Here, you can see all the user-applied tags applied to the file.
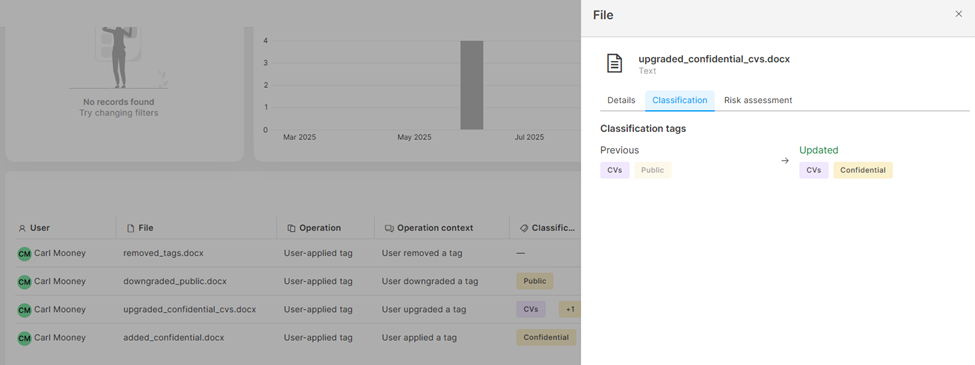
For operations where a user applied or removed a tag, you will also see:
- All tags applied before the operation
- All tags applied after the operation
FAQ
FAQ
Q: Can a file have more than one user-applied tag?
A: No, only one user-applied tag at a time is allowed at the moment.
Q: Can a file have both a user-applied tag and another type of tag (e.g. smart tag or 3rd party tag) at the same time?
A: Yes, a file can have different types of tags applied to it.
Q: Is the user-applied tag written into file metadata?
A: If the file format supports it (.docx, .xlsx, .pptx, .pdf, .xlsm), then yes – the tag is written into file metadata. For other formats, it is cached on the device.
Q: Do user-applied tags persist for files inside archives (like .zip or .rar)?
A: Yes, but only for file types that can store the tag in their metadata (.docx, .xlsx, .pptx, .pdf, .xlsm).
Q: Does Safetica allow users to influence 3rd-party labels via tags (e.g., propagate a user-applied tag to Microsoft sensitivity labels)?
A: No, Safetica cannot propagate user-applied tags to 3rd-party labels (such as Microsoft sensitivity labels) at the moment.
Q: Why doesn’t the Application column in the Data section show the app name for user-applied tagging?A: On Windows, applying and changing tags is recorded with a dash (i.e., as unknown application). This is because the Safetica tagging runs under a system process (dllhost.exe) rather than the application the user is working in. Because dllhost.exe is not a meaningful application name, Safetica records these tagging actions with a dash for "unknown app" instead. 