How does Safetica 10 handle USB devices?
Learn how Port settings work for USB devices.
Information in this article applies to Safetica 10 or older.
Safetica has always focused on ease of use and minimum invasiveness for both our customers and end users. To improve user experience even more, we changed the way Safetica 10.2 and newer handle USB devices in Device Control.
In this article, you will learn:
- How Safetica 10.2 and newer handle USB devices in Device Control
- How to block a multimedia device that is ignored by default
- What does the admin see in logs
In Safetica 10.1 and older, USB port settings in Protection > Device control > Advanced settings were applied to all USB devices. When you chose Block with the slider, you blocked the connection of all USB devices. This unnecessarily affected user experience, since it disabled many devices commonly used during remote work, home office, or conference calls.
How Safetica 10.2 and newer handles USB devices in Device control
In Safetica 10.2 and newer, we only apply USB port settings from Protection > Device control > Advanced settings to USB devices that have a storage and might pose a threat to data security (e.g. mass storages, WPDs, card readers, etc.).
USB port settings applied to multimedia devices (such as cameras, microphones, headsets) will be ignored by Safetica restrictions.
How to block a multimedia device that is ignored by default
If you need to block a multimedia device that is out of scope of Safetica protection (e.g. you want to forbid the use of a certain headset in your environment), you can use Safetica zones.
To block a multimedia device, just add it to a blocking Safetica zone.
Zone settings have priority over port settings.
What does the admin see in logs
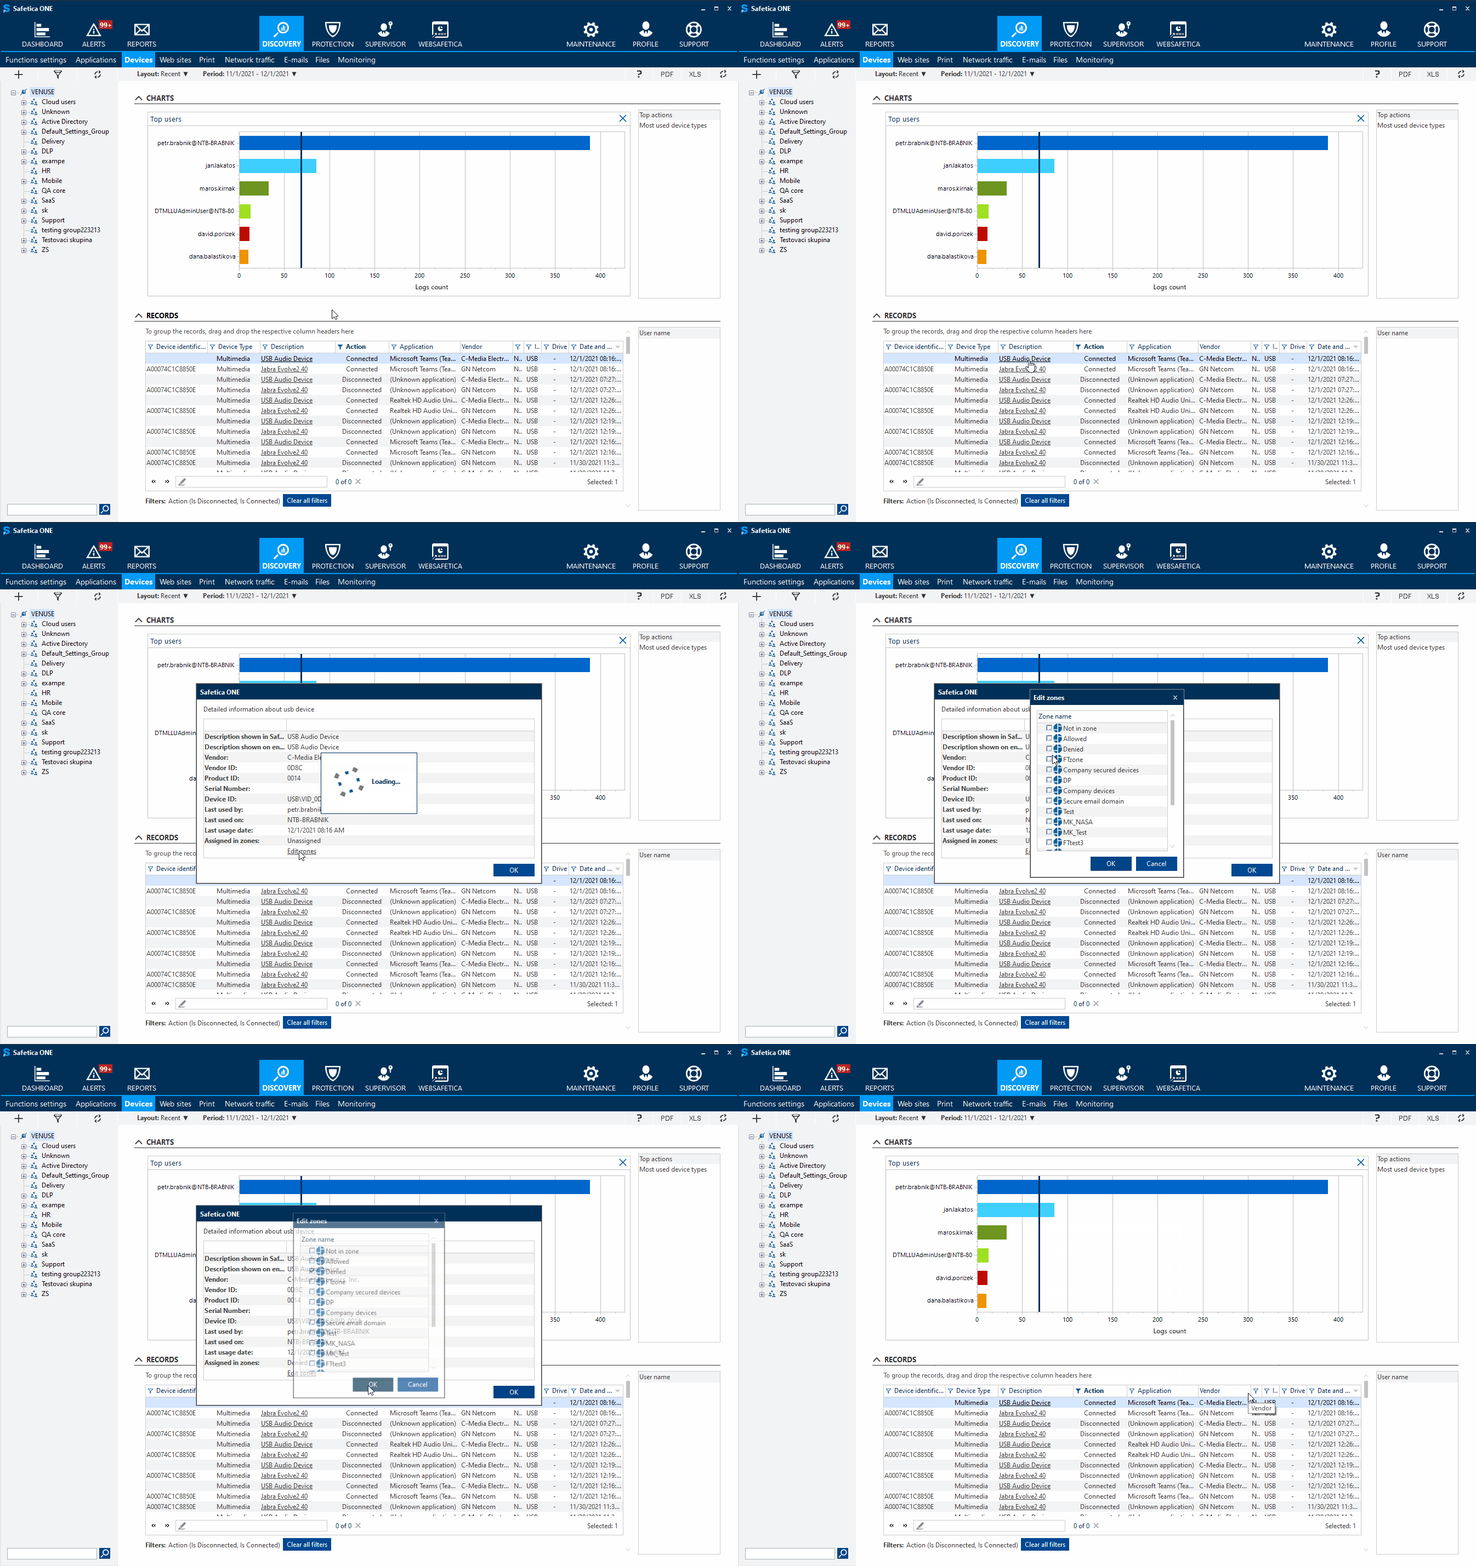
Logs for all USB devices can be found in Discovery > Devices or in Protection > Device control > Records.
Tip:
You can easily add a device to a safe zone from Discovery > Devices:
1. Click the name of the device in the Description column.
2. Click Edit zones.
3. Check the zones to which you want to add the device.

