Data categories help you classify files into different groups depending on who, where, and how can work with them. You can use them in DLP policies and data discovery tasks, and thus secure sensitive data. Data categories are available in Safetica Management Console in Protection > Data Categories.
In this article, you will learn:
- What data categories are there in Safetica ONE
- How to create a new data category
- How to configure a data category
- How to edit a data category
What data categories are there in Safetica ONE
Sensitive content – sensitive data identified based on dictionaries, algorithms, keywords, or regular expressions.
Existing classification (metadata) – pre-classified data identified using tags, metadata, or another type of file label.
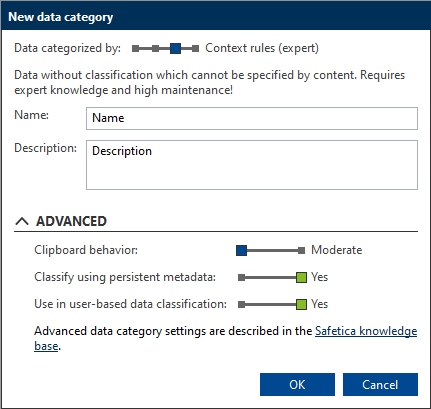
Context rules – data that cannot be specified by content. Requires expert knowledge and more maintenance.
File properties – files are protected based on their properties (e.g. file extensions). Suitable for files which cannot be scanned for classification or sensitive content (such as encrypted files).
To learn more details about individual data category types, click here.
How to create a new data category
1. Click New data category and enter its name and description.
2. In Data categorized by:, select the type of the data category (Sensitive content, Existing classification, Context rules, File properties)
3. If necessary, edit the Advanced section:
- For data categories Existing classification and Context rules, the Advanced settings let you adjust behavior of the clipboard:
- Moderate – the clipboard is restricted only if it’s used to transmit potentially sensitive content.
- Strict – the clipboard is always restricted based on DLP policies.
The Strict mode may result in unexpected propagation of data categories and limitations. Learn more here.
- For Context rules, you also have the option to classify data using persistent metadata.
- For Context rules, if you have persistent metadata enabled, you can use the category in user-based classification.
Learn more about user-based classification here.
4. By clicking OK, you will add the new category to the list on the left.
5. Save your changes by clicking 
6. Select the newly created data category and configure its behavior.
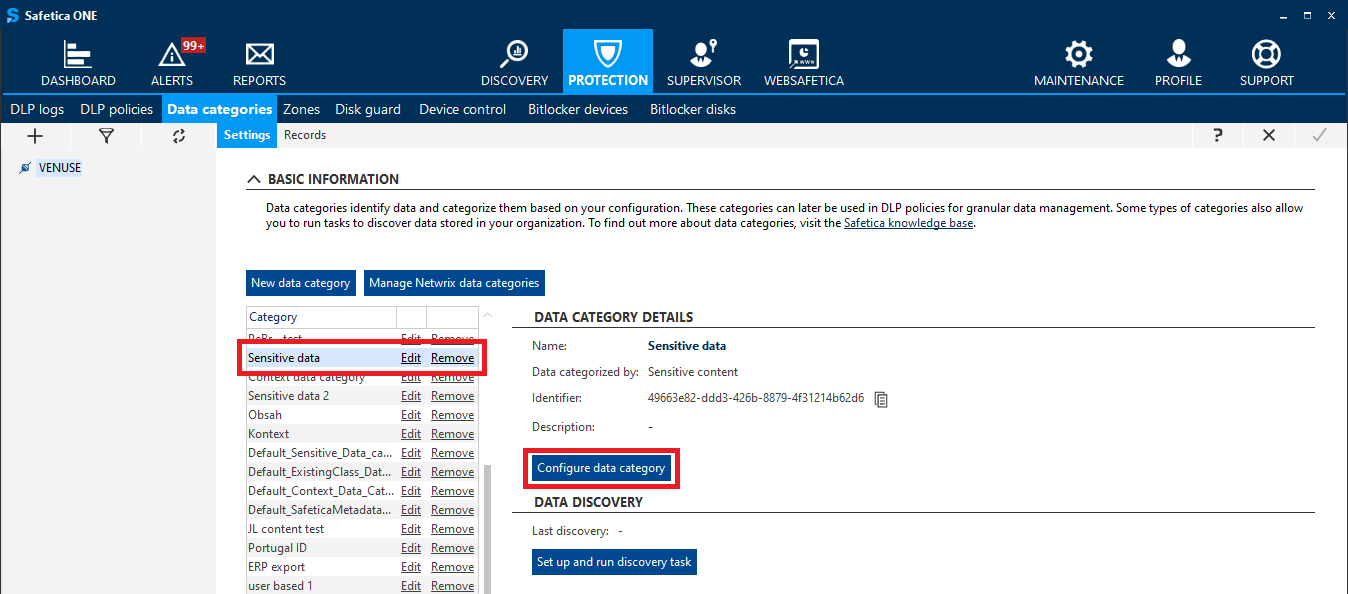
How to configure a data category
To configure a data category, select the desired category from the list on the left, click the Configure data category button, and refer to an articles:
- How to configure a sensitive content data category
- How to configure a data category by using existing classification
- How to configure a context data category
How to edit a data category
You can edit the name and description of an existing data category by clicking the Edit button next to each data category in the list.