How to categorize apps and websites
Categorizing applications and websites is vital for your app and website policies to work effectively.
Introduction
Learn how to easily categorize apps and websites in Safetica to better focus app and website policies and enhance the protection of your company data.
- How to categorize an app or website
- Example: Assigning category to World of Tanks
- Example: Categorizing all uncategorized apps
- Example: Categorizing uncategorized websites
How to categorize an app or website
- Go to the Apps or Websites section in Safetica console.
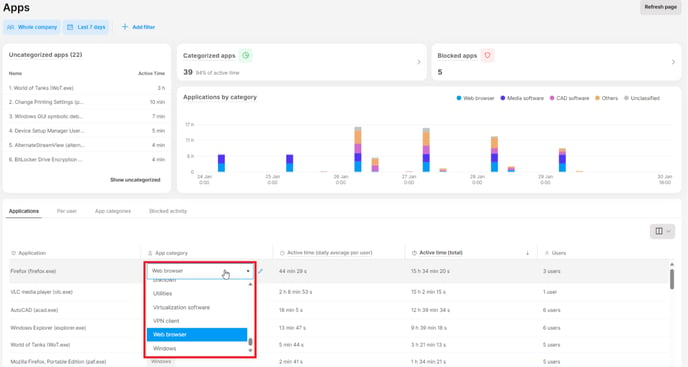
- Find the app or website in the table and click its category label.
- Select the desired category from the dropdown list.
Automatic refresh: When you assign or change a category, all charts and tiles on the page will automatically refresh to reflect the changes.
Safetica hosted on-premises: You can create new categories for applications and websites in Safetica Maintenance Console by following these steps.
Example: Assigning category to World of Tanks
In your company, World of Tanks is the most used uncategorized app. You decide to categorize it as a game. Then you can create a policy that blocks users from playing games, and they won't be able to play World of Tanks afterward.
Here's how you can categorize the World of Tanks in Safetica:
- Go to the Apps section in Safetica.
- Find World of Tanks by clicking Add filter and then Applications. Enter the name "World of tanks" into the field.
- In the table, click the Not set label.
- Choose Games from the dropdown list.
Example: Categorizing all uncategorized apps
After categorizing the World of Tanks, you decide to also categorize all the remaining uncategorized apps. Here's how you can do it in Safetica:
- In the Apps section, click Show uncategorized in the Uncategorized apps chart.
- All uncategorized apps will be filtered in the table.
- Click the Not set label for each app and choose the correct category from the dropdown list.
Example: Categorizing uncategorized websites
You decide to also categorize all uncategorized websites. Here's how you can do it in Safetica:
- Go to the Websites section in Safetica.
- Click the Uncategorized websites tile.
- Click the Not set label for each website and choose the correct category from the dropdown list.
