In this article, you will learn:
- More about Data discovery
- Data discovery permissions
- How to set up Data discovery
- How to disable Data discovery
Introduction: More about Data discovery
Data discovery searches your devices for files with sensitive data that have not been accessed or used for some time. By default, Data discovery:
- Is enabled.
- Runs on all devices in your company with Safetica Client installed.
- Searches for sensitive files on critical paths (i.e., the Documents, Desktop, and Downloads folders).
You can change these settings or disable Data discovery altogether.
✍️You can learn more about Data discovery in general here.
Data discovery settings in action
Want to see more about Data discovery settings? Watch the video below:
Data discovery permissions
Permissions for Data discovery are as follows:
-
Manage Data discovery: Only Safetica admins with the Data destinations, data classification, and categorization permission can access Data discovery settings. The permission can be enabled or disabled in Settings > Accounts and permissions.

How to set up data discovery
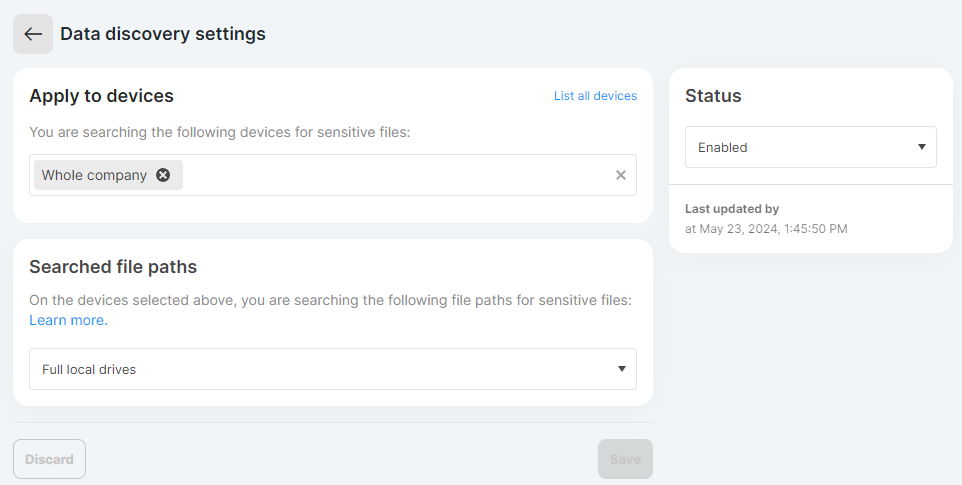
To change the settings of Data discovery:
- Go to the Data classification section in Safetica console.
- Click Data discovery settings.
- In Apply to devices, click List all devices and choose those devices on which Data discovery should run. The user tree only shows teams and devices, but not users.
- In Searched file paths, choose what paths should be searched for files with sensitive data. You can choose to search either:
-
- Full local drives – searches all local physical drives and their partitions/volumes.
✍️External hard drives, USB drives, network shares mounted as drives, cloud drives, and virtualized drives are skipped.
System folders and cloud folders are skipped.
Hidden files and temp files are searched as regular files.
-
- Critical paths – searches the Documents, Desktop, and Downloads folders for each user on the device.
5. Check that the Status of Data discovery is Enabled.
✍️You can see the results of Data discovery in the Data discovery section. Learn more here.
✍️You can also watch this video about data discovery.
How to disable Data discovery
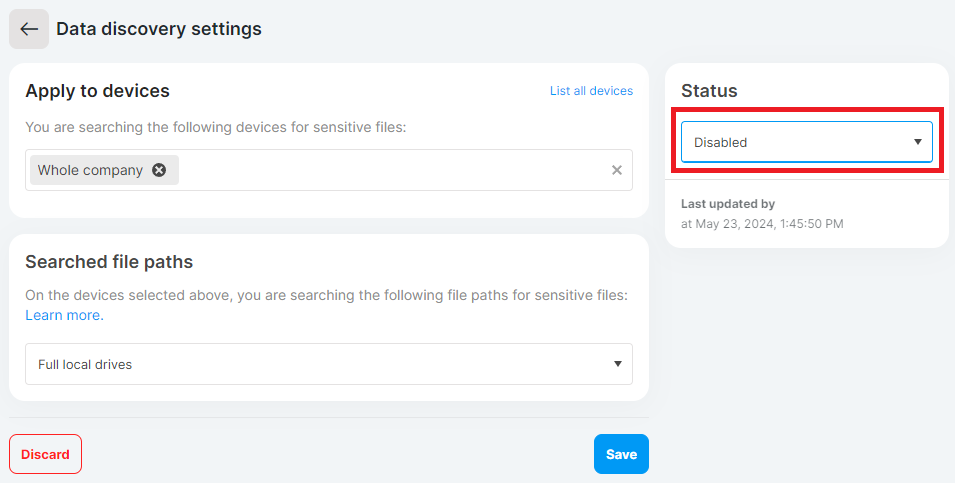
If you disable Data discovery, Safetica will stop searching for sensitive files stored on your devices.
To disable Data discovery:
- Go to the Data classification section in Safetica console.
- Click Data discovery settings.
- Change the Status of Data discovery to Disabled.