Introduction
In the Policies section, you can create policies for the protection of data, controlling the use of applications, and controlling website visits. You can also set up auditing policies for recording data-related operations.
In this article, you will learn about:
How to create a policy
✍️All policies in Safetica share a similar structure and follow the same evaluation system.
To create a policy:
1. Go to the Policies section and click one of the following tabs:
2. Click Add policy.
For every policy, you need to specify the following information:
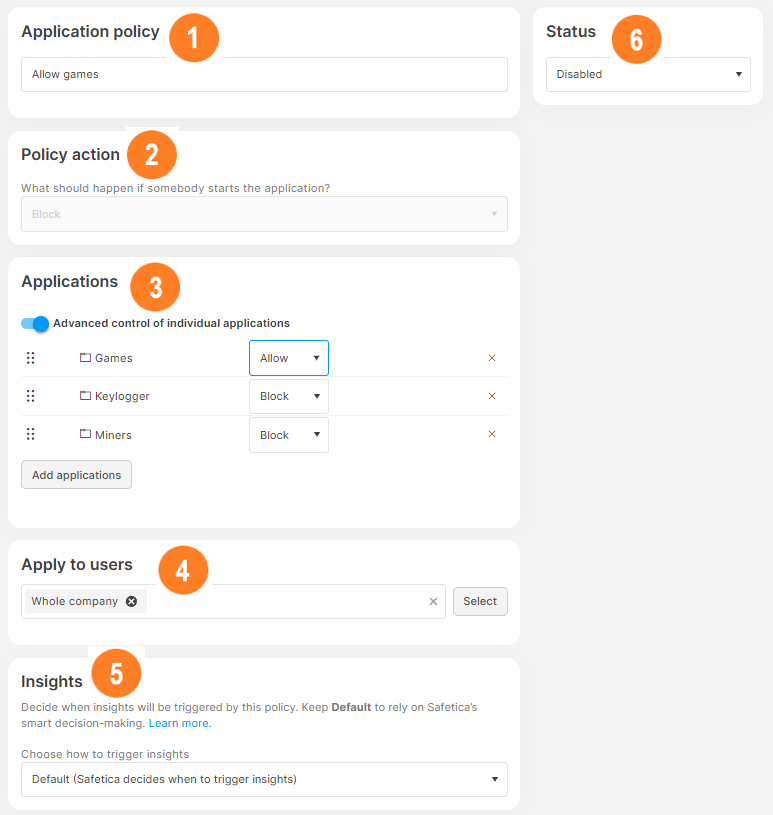
1. Policy name.
2. What action should be taken when the policy is violated (e.g. allowing or blocking games or Facebook access).
✍️You can either set the same action for all rules in a policy, or you can activate the Advanced control checkbox and set the action for each rule individually.
3. Specify applications, websites, or data to which the policy applies.
4. Identify users, teams, or devices to which the policy applies.
5. Select how the policy should generate insights. Learn more here.
6. Choose the policy status (Disabled policies are skipped during evaluation).
7. Set the policy priority. Since policies are evaluated from the top to the bottom of the policy list, you can just drag-and-drop a newly created policy to its correct position.

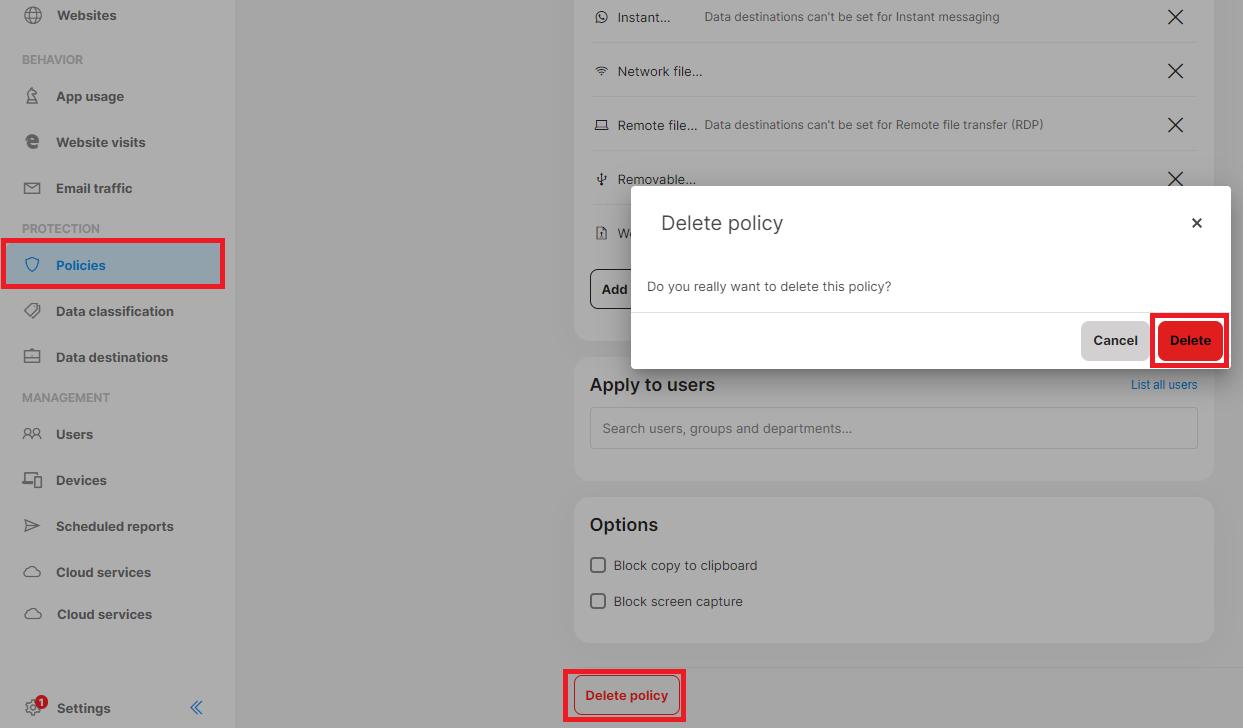
How to delete a policy
- Go to Policies and click the policy you want to delete.
- Click Delete policy at the bottom of the page.
Read next:
How are policies evaluated and prioritized
Auditing policies: Decide which data-related activities to audit