Introduction
✍️ Make sure your Microsoft 365 tenant is already added to Safetica. Learn how to do that here.
If you don’t want to sync and protect all Entra ID users, Safetica allows you to sync:
- Specific users (based on attributes like department or country)
- Security groups
How to synchronize specific Entra ID users
❗You can only specify the subset of Entra ID users when adding a new M365 tenant. To change the subset later, you'll need to remove the tenant and add it again with a new subset of users.
Step 1: Prepare a Microsoft Graph query
To sync only specific users, you must define a Microsoft Graph query based on shared user attributes such as country or department.
❗To write the Microsoft Graph query, you must be familiar with Microsoft Graph API.
To define the query:
1. Open Microsoft Graph Explorer and sign in with your global admin account.
2. Go to Users > All users in the organization.
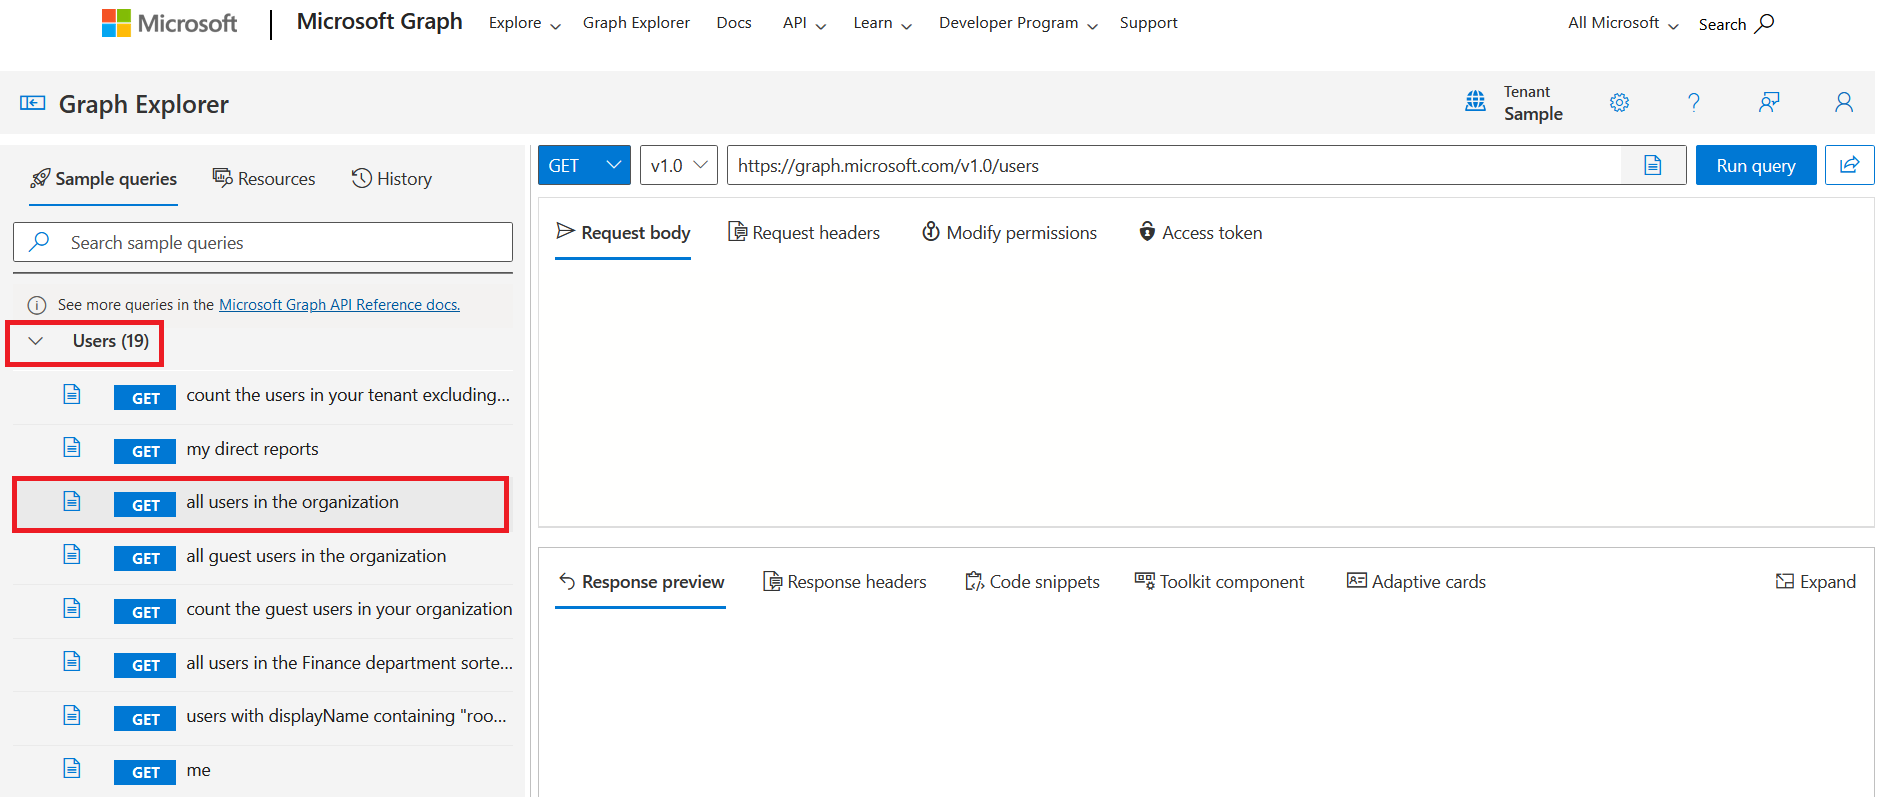
3. Based on the shared attributes of your user subset, choose the appropriate query parameters to narrow the selection to users you want to synchronize.
Example: Query to synchronize only users that are part of a specific country:
https://graph.microsoft.com/v1.0/users/?$filter=Country eq 'Czech Republic'
or
https://graph.microsoft.com/v1.0/users/?$filter=UsageLocation eq 'CZ'
Example: Query to synchronize only users that belong to a specific department (e.g. Finance):
https://graph.microsoft.com/v1.0/users/?$filter=Department eq 'Finance'
4. Test and validate that your query returns the intended results in Microsoft Graph Explorer. There is no syntax validation in Safetica console.
Step 2: Paste the query into Safetica console
Once you have a working query :
1. Open Safetica console.
2. In Cloud services, click the Add M365 tenant tile.
3. In the User scope step, check the Expert mode checkbox.
4. Select Specific users.
5. Paste only the part of the query after $filter= into the text box.
Example: https://graph.microsoft.com/v1.0/users/?$filter=Country eq 'Czech Republic'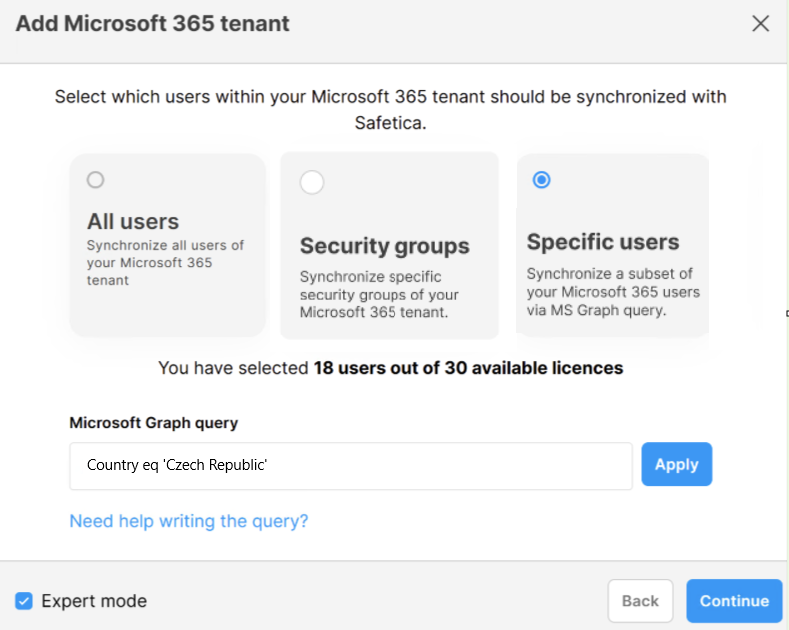
6. Click Continue and finish adding your M365 tenant.
Important notes
- Only users matching the MS graph query will be synchronized. Users who do not match the query will be ignored.
- The subset of users defined by the MS Graph query cannot be changed. If you need to change it later, you'll have to remove the tenant and add it again with a new subset of users.
- You can also sync specific security groups later in the tenant detail, but their users will also be limited by this subset query. Learn more here.
✍️Learn more about users and groups synced from your Microsoft 365 tenant here.
How to synchronize Entra ID security groups
You can choose which Entra ID users to sync based on their membership in security groups. If you are also using an MS Graph query, security groups will work as an additional filter that can narrow down the users selected by that query.
Example: If your company has 100 employees, you can use an MS Graph query to select 30 users for synchronization. Then you can use security groups to further narrow down that selection to 10 users. Users who are in the selected security groups but not included in the MS Graph query will not be synced – the MS Graph query defines the overall scope of synchronization.
✍️Learn how to synchronize Entra ID security groups here.
Read next
Introducing Safetica Cloud Protection
How to add your Microsoft 365 tenantActivating and deactivating Microsoft Outlook protection
Activating and deactivating Microsoft Exchange protection
Activating and deactivating Microsoft SharePoint protection