❗This article applies only to devices with macOS.
In this article, you will learn more about:
- Two ways of granting permissions
- How to grant permissions to Safetica Client via a signed Apple Configuration Profile
- How to grant permissions to Safetica Client manually (not recommended)
- Where to find what permissions are missing
- FAQ
Introduction: Two ways of granting permissions
After the successful installation of Safetica Client on a macOS device, certain permissions must be granted to the Safetica Client. You can do that either by installing our signed Apple Configuration Profile or manually.
❗Required for macOS: Grant permissions using Apple Configuration Profile. Without it, Safetica Client functionality on macOS cannot be guaranteed and may be limited.
Manual permission setup is unreliable and should only be used for testing or troubleshooting.
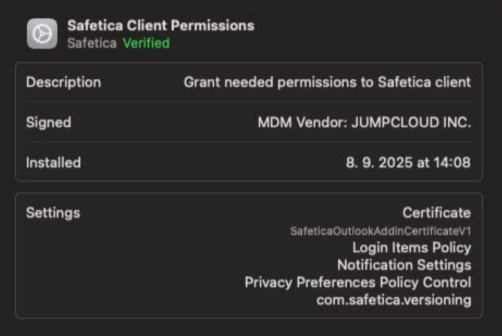
How to grant permissions to Safetica Client via a signed Apple Configuration Profile
Apple Configuration Profile contains all the system permissions required for Safetica Client to work correctly on macOS devices.
✍️You can download the Apple Configuration Profile signed by Safetica here.
For Microsoft Intune, use this unsigned Apple Configuration Profile.
❗Distribution via MDM only: Apple Configuration Profiles can only be distributed and installed on devices via MDM (Mobile Device Management).
To install an Apple Configuration Profile:
- Download the Apple Configuration Profile signed by Safetica here.
- Distribute the downloaded profile to macOS devices using your preferred MDM solution. You can find a list of MDM solutions here.
- (Optional) If Safetica Client is already installed on your devices, choose one of these options after distributing the profile:
Option A: Restart the devices.
Option B: Restart Safetica services on the devices using the Terminal. Run the following commands:
sudo /Library/Application\ Support/Safetica/Tools/setup UnloadAllServices
sudo /Library/Application\ Support/Safetica/Tools/setup LoadAllServices
Tip: You may see Boot-out failed: 5: Input/Output error messages after running the UnloadAllService command. This is normal and can be ignored.
4. Install Safetica Client on the macOS device. Learn more about Safetica Client installation here.
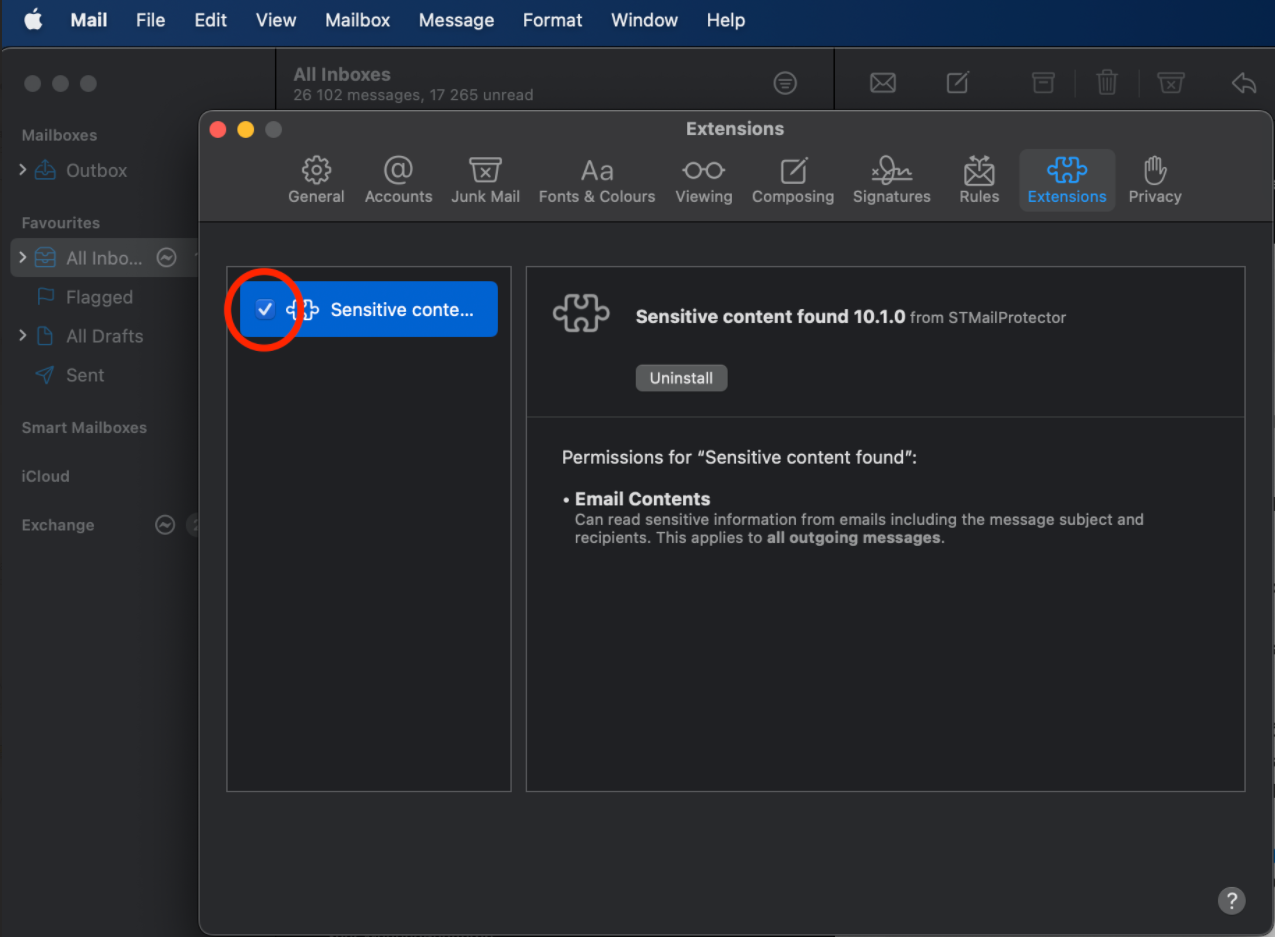
5. Enable the Sensitive content found extension in the Mail app:❗The Sensitive content found extension is only supported on macOS 12 and newer.
-
- In the Mail app
 , choose Mail > Settings, then click Extensions.
 - In the list of Mail extensions, find the Sensitive content found extension.
- Enable it by selecting its checkbox.
- In the Mail app
MDM solutions
✍️If you need a free MDM solution, consider:
- jumpcloud (free for up to 10 devices and users)
Other MDM solutions you can use:
- Miradore
- InTune - Custom macOS Settings
- JAMF - Computer Configuration Profiles
- JumpCloud - Custom Configuration Profile Policy
❗Enrollment into MDM solution and distribution of Apple Configuration Profiles may sometimes take a while. To speed things up, restart the affected devices in these situations:
- After enrolling devices into the MDM solution.
- After distributing new Apple Configuration Profiles to devices.
How to grant permissions to Safetica Client manually (not recommended)
❗Required for macOS: Grant permissions using Apple Configuration Profile. Without it, Safetica Client functionality on macOS cannot be guaranteed and may be limited.
Manual permission setup is unreliable and should only be used for testing or troubleshooting.
For Safetica Client to work correctly on macOS devices, you need to:
-
Allow Full Disk Access - required for file audit.
-
Allow notifications - required for user notifications.
-
Allow access to web browser data in Safari, Chrome, Opera, and Microsoft Edge - required for web audit (Safari, Chrome, Opera, and Microsoft Edge).
-
Enable the Sensitive content found extension in Mail app - required for audit and protection of outgoing emails through the Mail app.
-
Allow STUserApp - required for correctly auditing and blocking emails sent via Mail app.
-
Install trusted certificate – required if you want to enable protection for emails sent via Microsoft Outlook.
❗After performing the steps above, you need to perform one of these options:
Option A: Restart the devices.
Option B: Restart Safetica services on the devices using the Terminal. Run the following commands:
sudo /Library/Application\ Support/Safetica/Tools/setup UnloadAllServices
sudo /Library/Application\ Support/Safetica/Tools/setup LoadAllServices
Tip: You may see Boot-out failed: 5: Input/Output error messages after running the UnloadAllService command. This is normal and can be ignored.
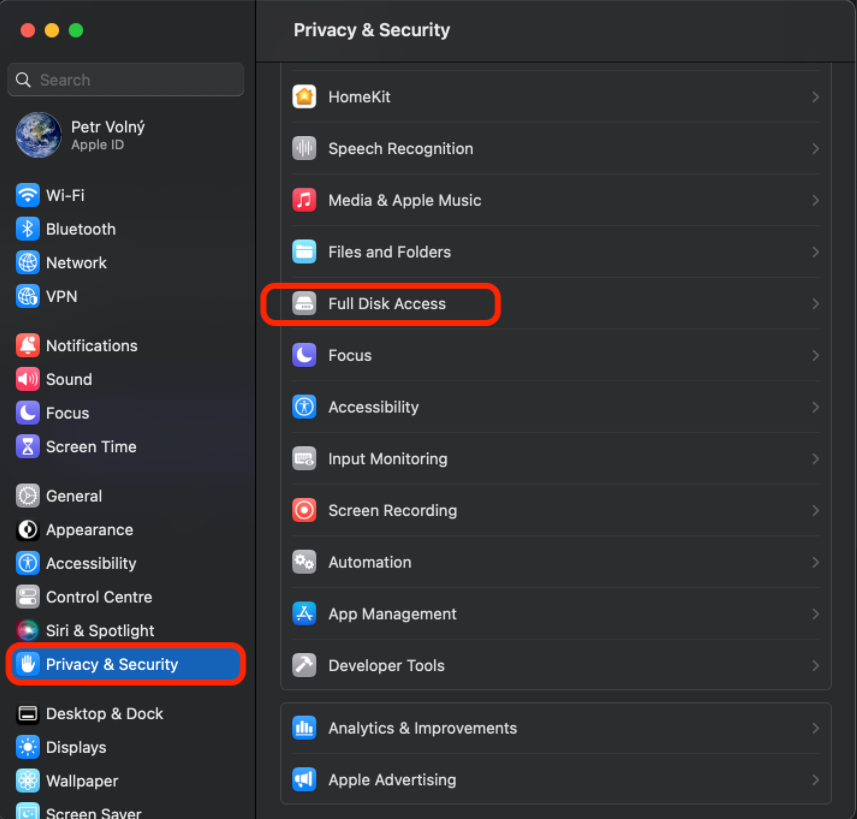
1. Allow Full Disk Access
Full Disk Access is crucial for the correct functioning of Safetica and needs to be allowed manually after Safetica Client is installed.
a. Go to System preferences > Privacy & Security > Full Disk Access.
b. You will see our services – STClassiTagger, STContentService, STCService, and STFileMonitor – easily recognizable by the Safetica logo.
c. Switch their toggle to Allow. This will give these services Full Disk Access.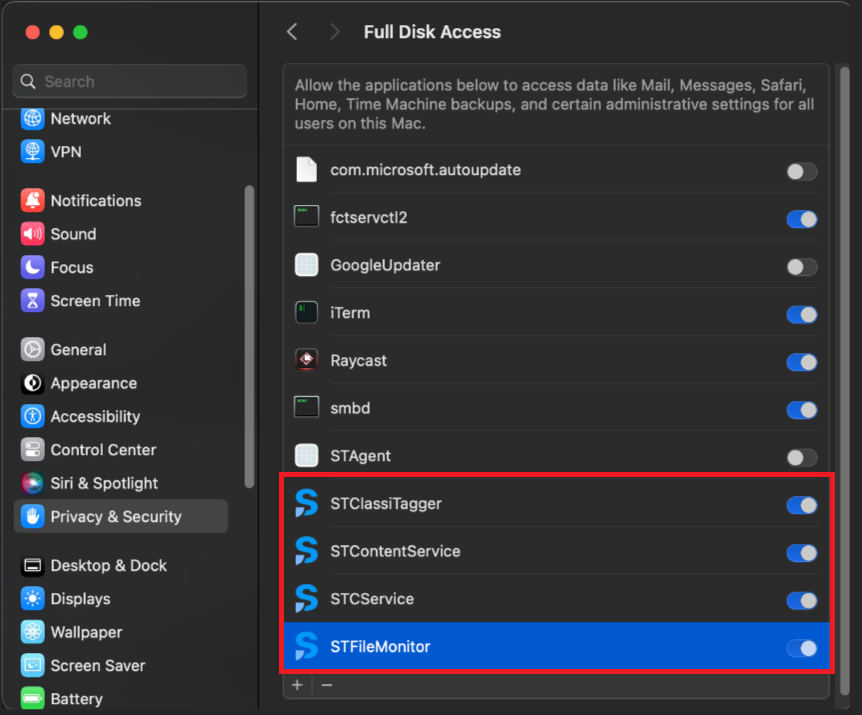
❗We strongly recommend not granting the permission to services you do not know or services that you are not specifically willing to grant the permission to.
2. Allow notifications
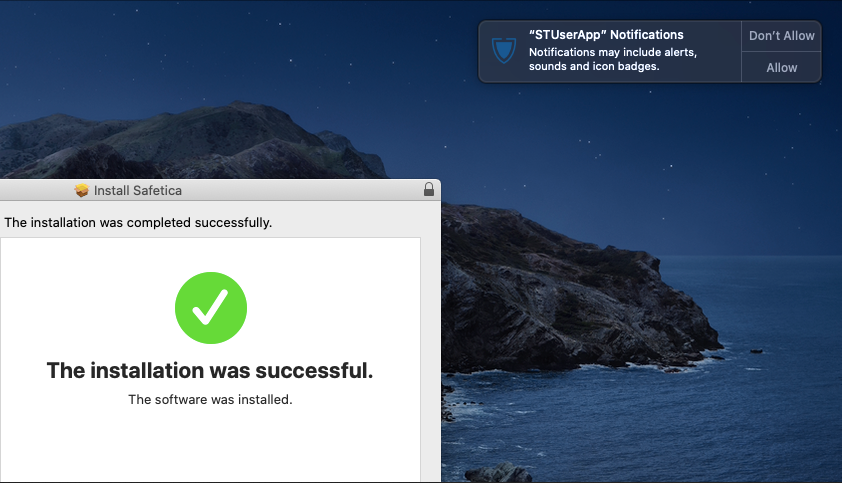
After the successful installation of Safetica Client, a pop-up related to user notifications and alerts appears. Click Allow.
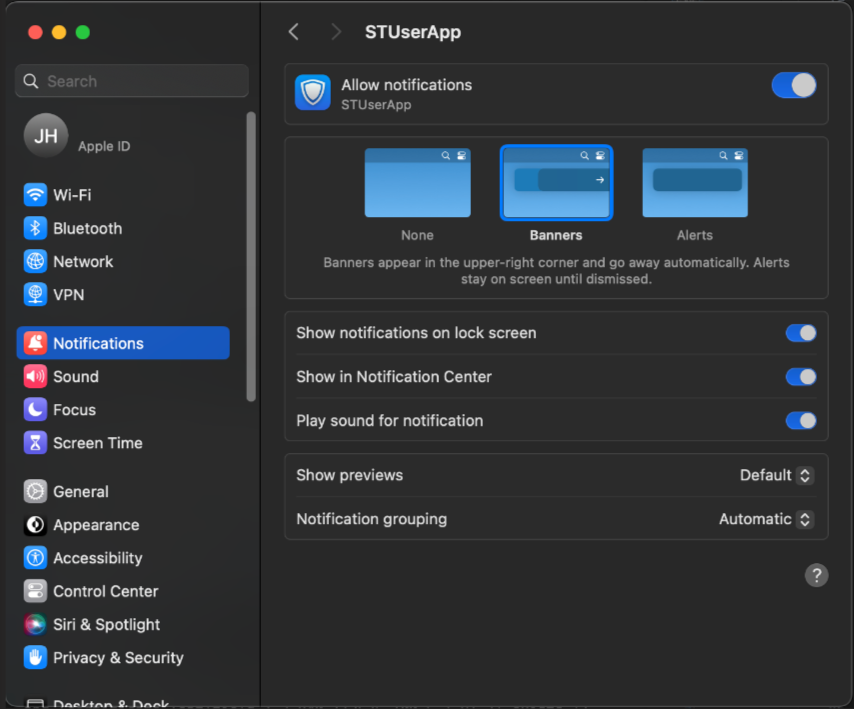
Further options related to user notifications are available in System preferences > Notifications > STUserApp.
3. Allow access to web browser data in Safari, Chrome, Opera, and Microsoft Edge
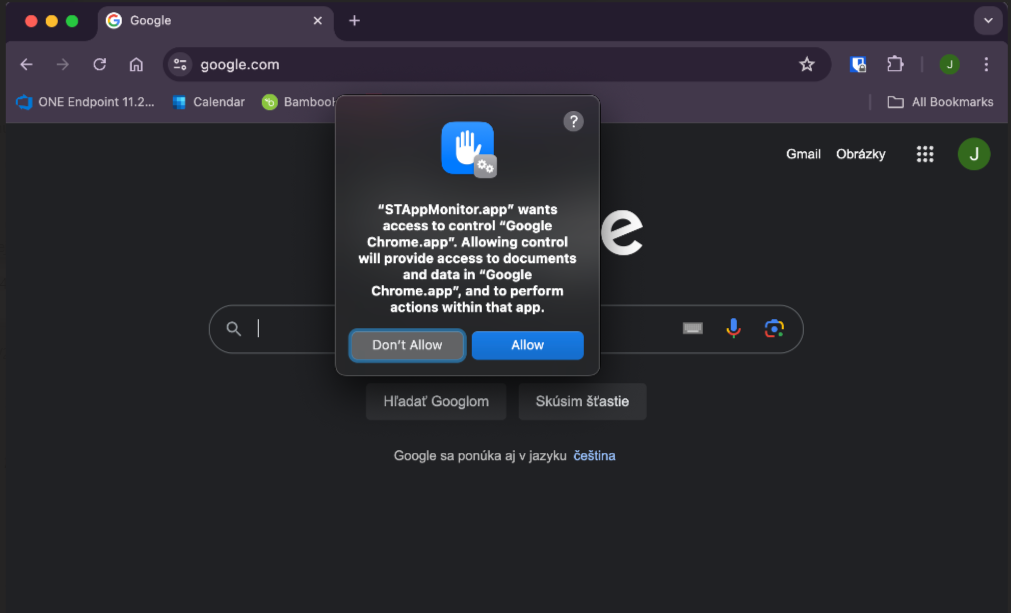
When you open the Safari, Chrome, Opera, and Microsoft Edge web browsers for the first time after installing Safetica Client, a pop-up appears. You must click Allow.
❗This pop-up will be displayed repeatedly in regular intervals when the user works with Safari, Chrome, Opera, or Microsoft Edge. They must always click Allow for web audit to work correctly.
If web browser permissions are not granted, they will be requested automatically after every browser restart.
This issue will not occur if you grant permissions to Safetica Client via the Apple Configuration Profile instead of manually.
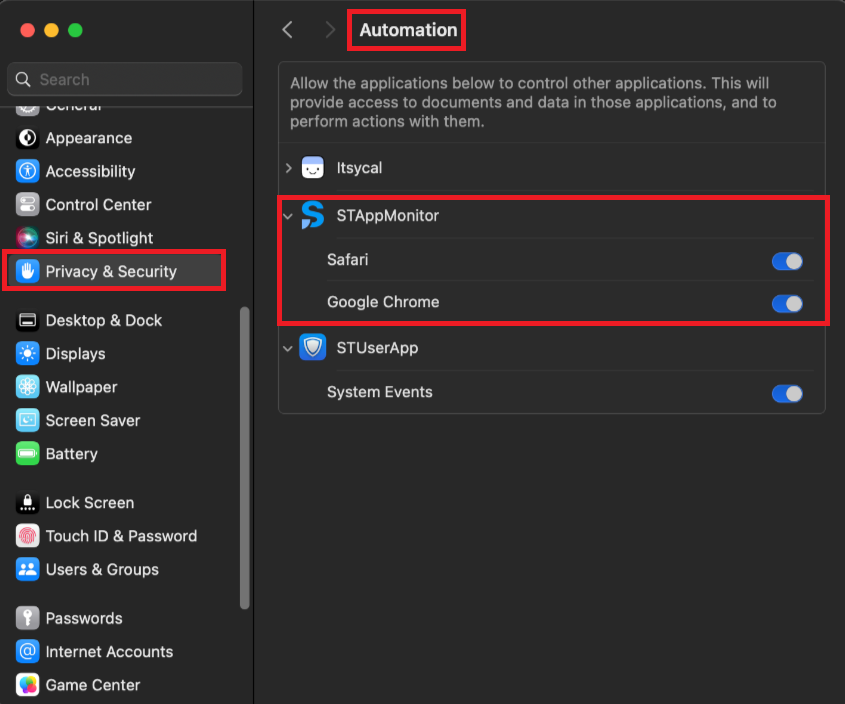
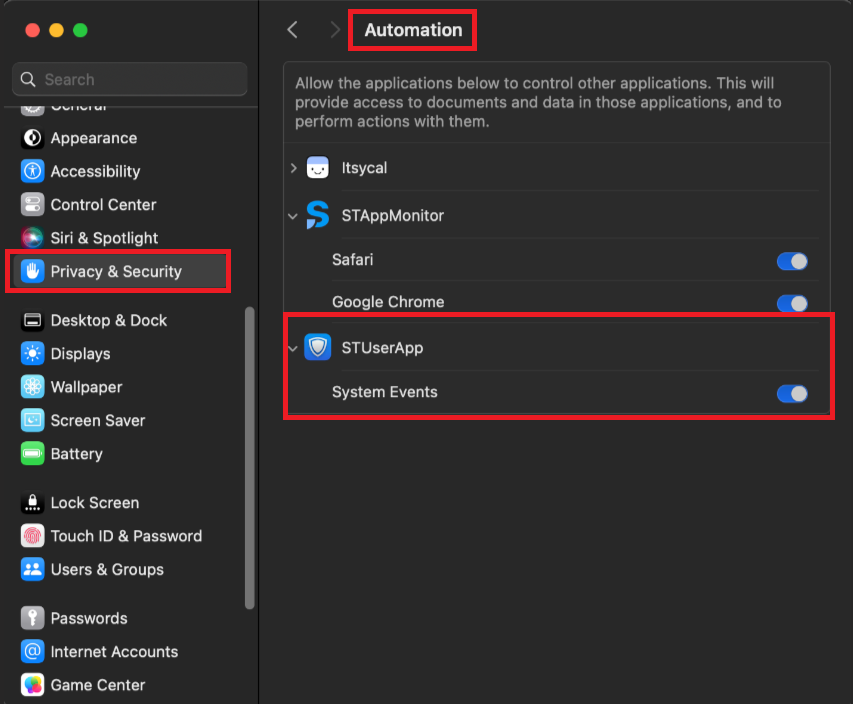
If you are having issues, you can check that permissions are granted correctly to Safari, Chrome, Opera, and Microsoft Edge in System preferences >Privacy & Security > Automation > STAppMonitor.
4. Enable the Sensitive content found extension in the Mail app
❗The Sensitive content found extension is only supported on macOS 12 and newer.
-
In the Mail app
, choose Mail > Settings, then click Extensions. -
In the list of Mail extensions available on your device, find the Sensitive content found extension.
-
Enable it by selecting its checkbox.
❗To make email auditing and blocking policies work correctly, you must allow the STUserApp.
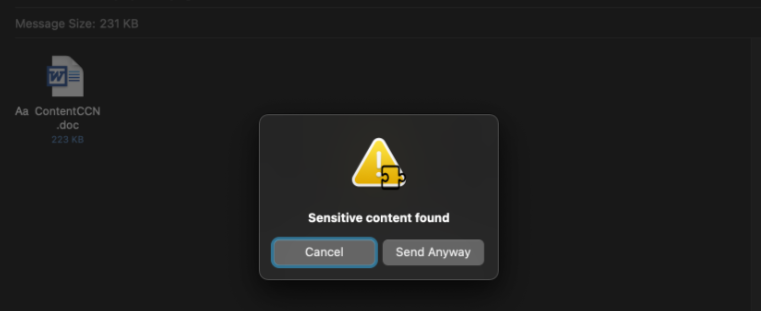
Otherwise, email auditing and blocking will not work correctly. Users will be able to send emails that violate blocking policies by clicking a Send anyway button in a pop-up.
5. Allow STUserApp
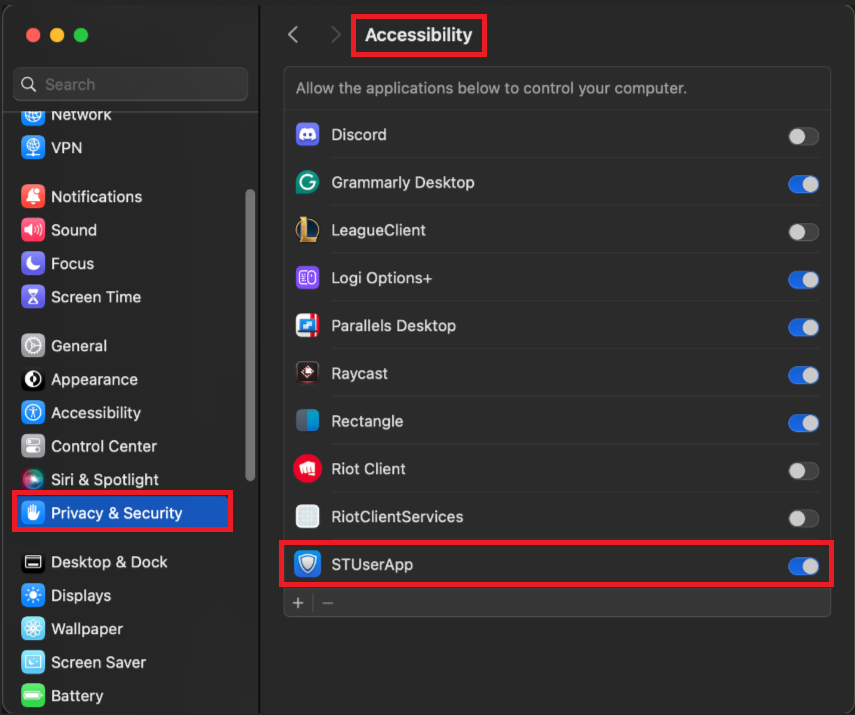
To correctly audit and block emails sent via the Mail app, you must allow the STUserApp in:
- System preferences > Privacy & Security > Automation (> Privacy (on older systems)) and in
- System preferences > Privacy & Security > Accessibility (> Privacy (on older systems))
❗If you do not see STUserApp in Automation or Accessibility, try sending an email that violates a blocking policy. STUserApp should then appear in those sections.
❗If you do not allow STUserApp in Automation or Accessibility, email auditing and blocking will not work correctly. Users will be able to send emails that violate blocking policies by clicking the Send anyway button in a pop-up.
❗After allowing STUserApp, when the user sends an email that violates a blocking policy for the first time, 2 pop-ups will appear:
- A pop-up that enables the email to be sent even though it should be blocked. The user must click Cancel.
- A pop-up concerning the STUserApp. The user must click Allow.
Afterward, email blocking should work correctly.

✍️If you have issues with email blocking not working correctly, please check that the STUserApp is allowed in System preferences > Privacy & Security > Automation and in System preferences > Privacy & Security > Accessibility.
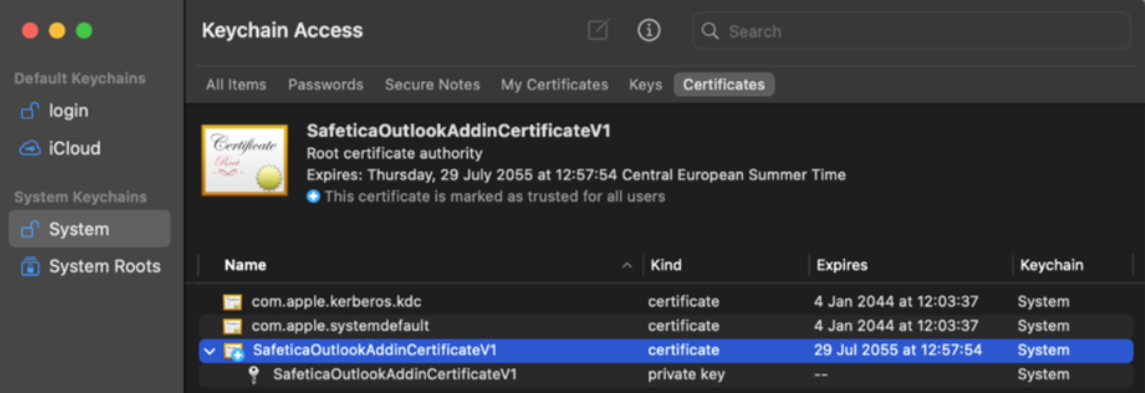
6. Install trusted certificate
After updating Safetica Client to a version that supports protection for emails sent via Outlook (Safetica Client 11.21.5 or newer), you must install a trusted certificate:
- Open Terminal and run the following command to install the trusted certificate: sudo /Library/Application\ Support/Safetica/Tools/setup InstallTrustedCertificate

- (Optional) Verify the certificate installation:

-
- Open Keychain Access (press CMD+SPACE, type "Keychain Access" and press Enter).
- Check that the Safetica certificate is marked as trusted (If the status doesn't update immediately, close and reopen Keychain Access).

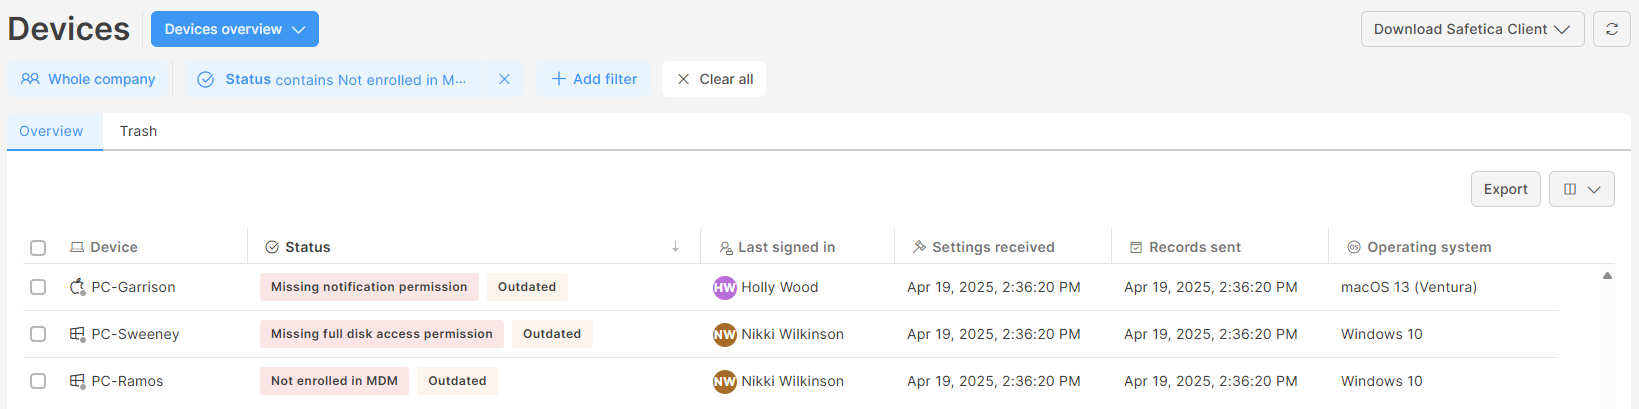
Where to find what permissions are missing
You can see what permissions are missing in Safetica console in Devices > Status column.
FAQ
Q: I have an issue with macOS - I can send emails via Outlook, even though I have a policy that blocks such emails. What should I do?A: This status indicates that the device is not enrolled in a Mobile Device Management (MDM) solution. To resolve it, enroll the device in an MDM of your choice. Here are some MDM solutions you can use.
Read next
How to install Safetica Client to your devices