Product plans: Standard | Premium | Enterprise | On-Prem (see: Limits by plan)
✍️Learn more about reports, including how they work, what permissions they need, how to download them, or how to disable them here.
How to create a report
Report creation in action
Want to see report creation in action? Watch the video below:
To create a report, go to Safetica console > Reports and click Create report. Then go through the following sections:
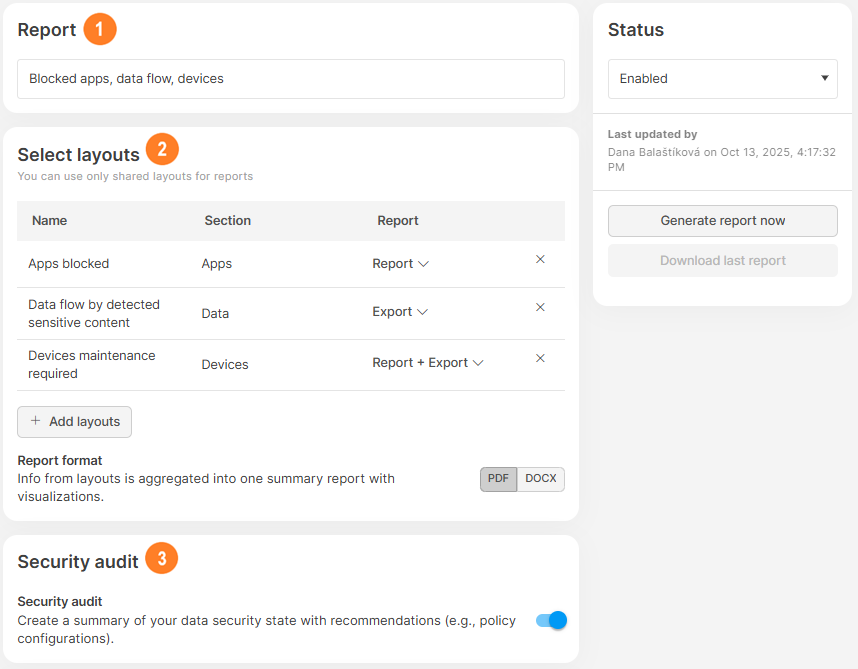
1. Report: Give your report a clear, descriptive name.
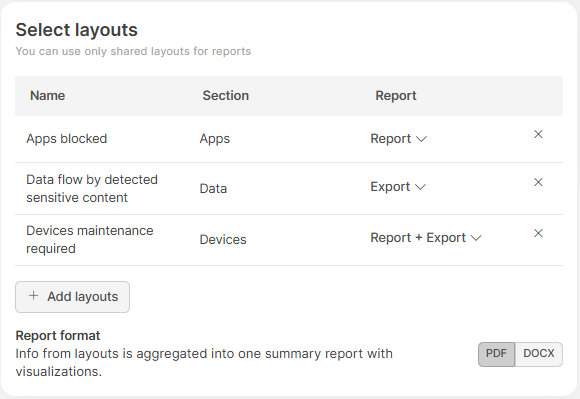
2. Select layouts: Layouts define what data the report includes.
✍️All predefined and shared layouts are available for selection. Private layouts can't be used in reports. Learn more about Layouts here.
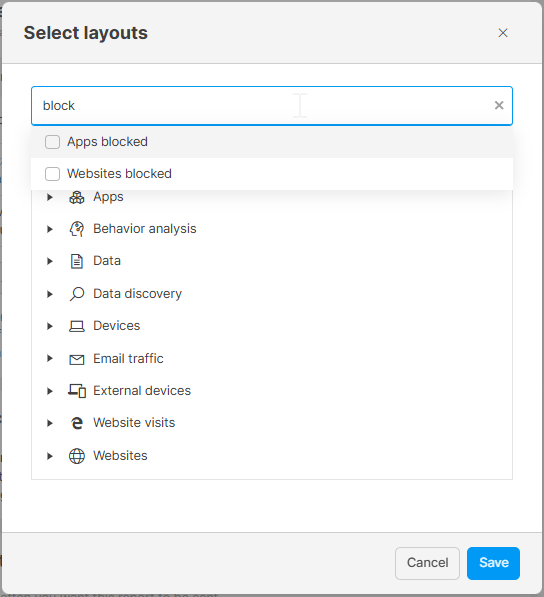
- Click +Add layouts to select one or more layouts.
- Find layouts in the list, or use the search field to quickly find them by name.

- For each selected layout, choose the report type:
- Report: The layout will be included in the summary report (PDF or DOCX) with aggregated data and visualizations. Each layout appears as a separate section.
- Export: Raw data from the layout will be exported to a separate XLSX file. May take longer to generate.
- Report + Export: Combines both options – includes the layout in the summary report and creates a separate data export. May take longer to generate.
- Report format: Select the summary report format - PDF or XLSX.
❗Selecting more than 5 layouts may slow down report generation .
3. Security audit (optional): You can include the Security audit – a document summarizing Safetica’s security findings, observations, and suggestions for mitigating security risks using Safetica's capabilities (e.g. policy configuration tips).
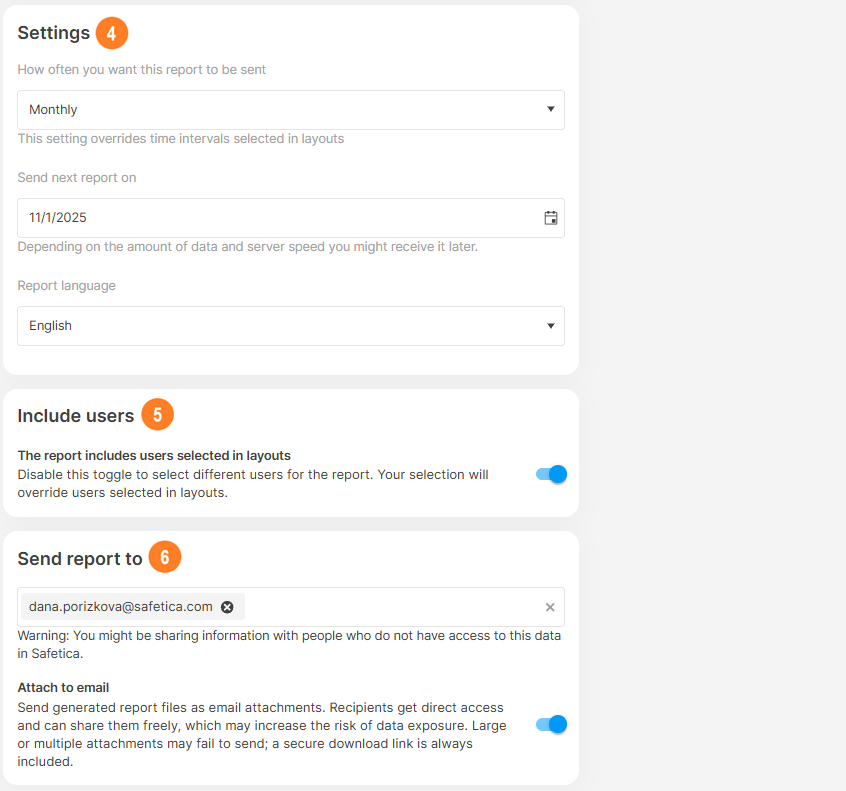
4. Settings: Decide how often and in what language the report should be created. The report’s date range is not inherited from layouts – the interval selected here will be used in the report (daily, weekly, monthly, or quarterly).
❗Reports with large datasets (especially quarterly ones) may take longer to generate.
- By default, users selected in layouts are included in the report.
- To override the default selection, toggle Include users off and select other users or teams.
6. Send report to: Specify who should receive the report via email.
- Safetica can send reports directly via email as a download link (requires Safetica console verification) or as a file attachment. Attachments are especially useful for managers and executives who don’t have access to Safetica console.
- To send the report as an attachment, toggle Attach to email.
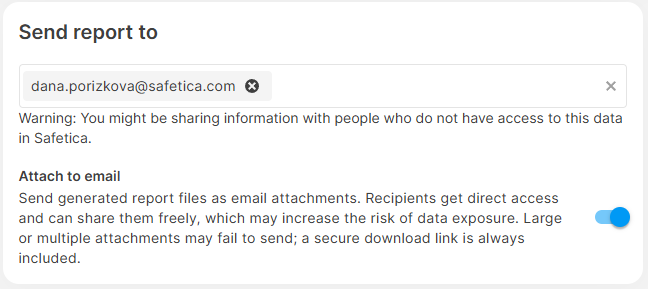
❗If the report file is too large, it may not be delivered as an attachment. Only the download link will be sent in the email.
Report options
You can find these options on the right side of the report configuration page:

Status: Enable or disable the report after creation.
Download last report: Download the most recent report stored on the server.
Generate report now: Manually create a report immediately.
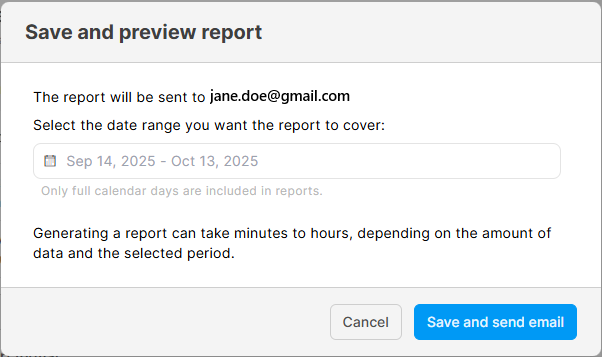
How to set a custom date period for a report
By default, reports cover the period set in the Settings section (daily, weekly, monthly, or quarterly). To generate a report for a specific past period:
- Go to Reports and edit or create a report.
- Click Generate report now.
- Select the desired start and end dates.
- Default: last 30 days
- You can select any date range up to 90 days in the past (including today).
- Click Send email. The report will be emailed and saved to the server.
FAQ
Q: Why can't I see my custom layout when I'm creating a report?
A: It’s likely set to private. Private layouts cannot be used in reports. Only shared and predefined layouts can be used in reports. Change the layout to shared (requires the Reports and shared layouts permission). Learn more here.
Q: Can I get reports in PDF format?
A: Yes, reports can be generated as PDF, DOCX, or XLSX files. The Security audit is available in DOCX only.
Q: What's the difference between Report and Export?
A:
- Report: A formatted document with visualizations, graphs, and summaries (PDF or DOCX).
- Export: Data in XLSX format for detailed analysis.
Q: Can I generate a report for today?
A: Yes. In the report detail, click Generate report now and select today’s date.
Q: What happens if I select multiple layouts?
A: Each layout becomes a separate section in a combined report (PDF or DOCX) or a separate XLSX file if exporting data.
Q: Can I forward the email with the report to others?
A: Yes, you can forward the report or download link to anyone who needs it. But note that recipients get direct access to the reports and can share them freely, which may increase the risk of data exposure.
Q: How long does report creation take?
A: Depends on your environment size and selected layouts. Reports with exports (XLSX) or large datasets may take a few minutes.
Q: My report wasn’t attached to the email. What happened?
A: If you have the Attach to email option enabled and the report still didn’t arrive as an attachment, it is probably because it exceeded email attachment size limits.
Q: Why do I see only 15 records and 6 columns in my report?
A: The summary report shows a preview (up to 15 records and 6 columns). For complete data, use the Export option to generate an XLSX file.
Q: Can recipients without console access get reports?
A: Yes. They can receive reports via email as attachments (download links require Safetica console verification). Just enable the Attach to email toggle in the report's settings.
Read next