Safetica installation guide
Learn about Safetica installation, including licenses, automatic and manual installation, signing in to Safetica console, trying Safetica with demo data, and installing Safetica Client.
This article provides comprehensive guidance on various aspects of Safetica installation.
You will learn more about:
- Cloud-hosting: Installation
- On-premises hosting: Installation
- Trying Safetica with demo data
- How to install Safetica Client to your devices
Cloud hosting: Installation
✍️No server installation: If you've purchased cloud-hosted Safetica, you do not need to install Safetica Server. Instead, your Safetica Partner will create the environment for you and give you access.
Safetica Partners: Learn more about customer registration here.
- First sign-in to Safetica console: The first user to sign in to Safetica must agree with the Safetica Terms of Service.
- Demo data: After signing in, you can immediately experiment with Safetica using demo data to explore new features without affecting your environment. Learn more here.
- Protect your devices: To receive data from your own devices, you need to install Safetica Client on the devices you want to protect. Learn how to install Safetica Client here.
On-premises hosting: Installation
✍️Only follow the steps below if you've purchased Safetica hosted on-premises.
To get Safetica up and running, you need to install:
-
Safetica (either automatically or manually)
- Safetica Client (to your devices)
Needed license
An existing license is needed for collecting records from devices. You will need to input your customer ID (preferred) or license key when signing into the Safetica console for the first time.
How to install Safetica automatically
The automatic installation installs SQL database and Safetica server components.
To start automatic installation:
-
Download the Safetica installer. The latest version of Safetica installer can be found here: https://go.safetica.com/safetica
-
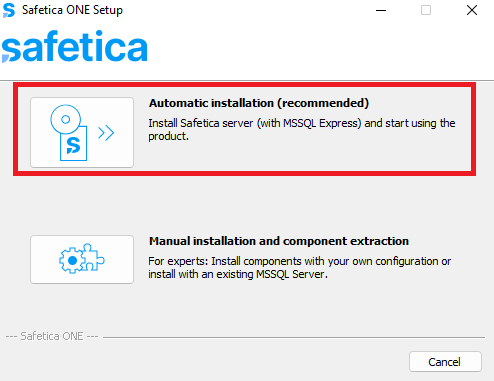
Run the installer and choose Automatic installation.
✍️Automatic installation installs the following components:
- Safetica Management Service and Safetica Server services
- Microsoft SQL Express 2019 with safetica_data database that is used for storing logs and settings
- Safetica web-based console running in IIS (Internet Information Services)
❗The Microsoft SQL Express Edition is suitable for smaller companies, but it has some limitations, such as the maximum size of each relational database being 10 GB.
By default, when 80% of the database size limit is reached (i.e. there are about 8 GB of logs in the database), the oldest logs are deleted automatically until the database is less than 70% full.
3. Set up your admin password for the default database account named "safetica". This account is utilized by Safetica server applications for SQL database authentication.
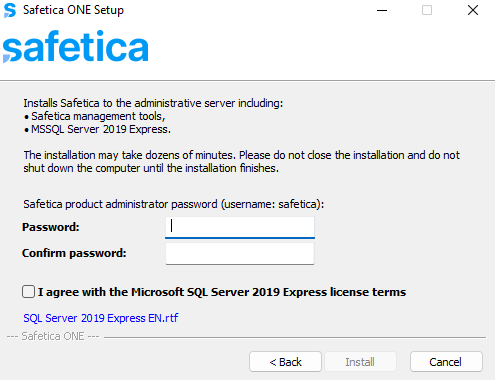
❗The user name and password for the database account cannot be changed after configuration. Modification would disrupt the connection to Safetica services, and Safetica would need to be reinstalled.
4. Click Install to start the installation.
How to install Safetica manually
-
Download the Safetica installer.
-
Run the installer and choose Manual installation.
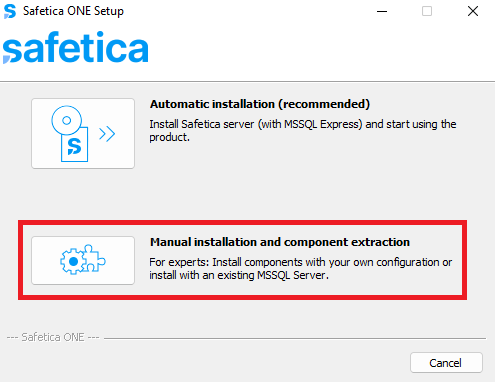
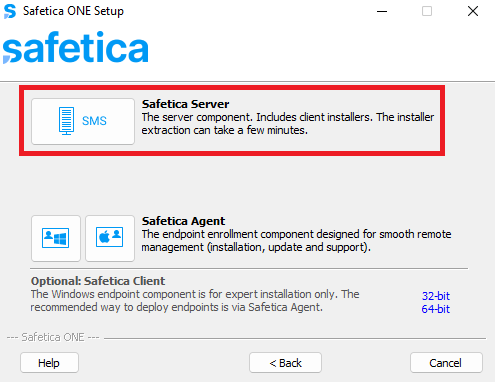
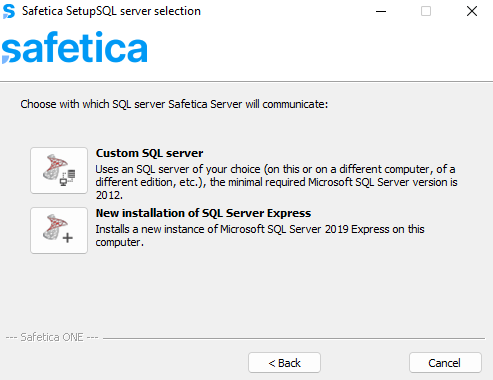
4. During installation, you can choose to install a new MS SQL Server 2019 Express or use your own SQL server.
❗The minimum supported version for your own server is MS SQL Server 2016.
❗The Microsoft SQL Express Edition is suitable for smaller companies, but it has some limitations, such as the maximum size of each relational database being 10 GB.
By default, when 80% of the database size limit is reached (i.e. there are about 8 GB of logs in the database), the oldest logs are deleted automatically until the database is less than 70% full.
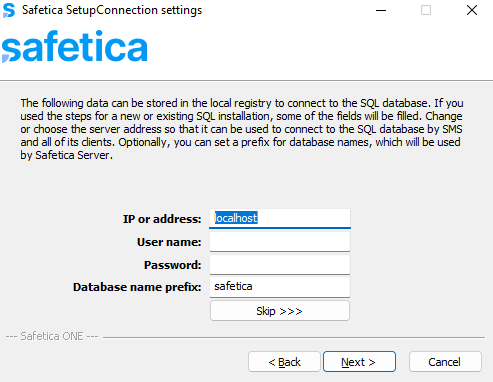
❗The user name and password for the database account cannot be changed after configuration. Modification would disrupt the connection to Safetica services, and Safetica would need to be reinstalled.
How to sign in to Safetica console
Watch the video and read the details below:
- To sign in to Safetica, open your browser and go to https://server_name/safetica.
- When you access the console in your web browser for the first time, you may receive a notification that the connection is not private. To resolve the issue, please follow the steps mentioned in this article.
- Enter your customer ID (preferred) or license key. The server must be connected to the internet to verify the entered ID or number.
- During onboarding, you will create a new admin account. Enter the required details, and agree with Safetica’s end-user license agreement.
- The first user to sign in to Safetica must agree with the Safetica Terms of Service.
For advanced use cases: How to install Safetica Maintenance Console
Safetica Management Console in its original form was discontinued and transformed into Safetica Maintenance Console, which serves only for advanced (mostly maintenance) use cases that are not yet supported in the new Safetica console. Only install it if necessary.
Learn more about Safetica Maintenance Console here.
Trying Safetica with demo data
✍️You can immediately experiment with Safetica using demo data to explore new features without affecting your environment.
How to install Safetica Client to your devices
To receive records from devices you want to protect, you need to install Safetica Client on them. Learn how to install Safetica Client here.
FAQ
Q: What web browsers can I use to access Safetica console?
A: The only unsupported browser is Internet Explorer. Other than that, you can use any browser.
Q: Where can I find the download link to Safetica? Where can I find the link to download the Safetica Universal Installer (the safetica.exe file)? Where can I download the latest version of Safetica?
A: You can find the latest version of Safetica installer in the Partner Portal or on this link: https://go.safetica.com/safetica. If you want a different version, please contact Safetica Support.
Q: Can I install Safetica offline (without internet access)? Can I install Safetica in air-gapped environments? Can I install Safetica to an environment that is never connected to the internet?
A: Normally, you need to be connected to the internet to verify Safetica license. If you have an air-gapped environment that is never connected to the internet and you need to perform offline installation, please contact Safetica Support for assistance. Offline installation is possible, just a bit more complex. The same system requirements apply as for online environments.
Q: When is the next update planned?
A: We release public Safetica updates approximately once in 2-4 weeks.
Q: Can Safetica be installed on a NAS storage?
Read next:
Resolving a certificate issue when accessing Safetica
System requirements and compatibility overview for the new Safetica

