Introduction
✍️Learn more about our Outlook protection here.
Safetica’s Outlook protection lets you audit and protect sent emails. Activation is a three-part process:
-
Step 2: Allow Outlook on the web to access your local network
-
Step 3: Distribute and deploy the Outlook add-in in your company
Prerequisites
Before you begin, make sure you have:
- Your Microsoft 365 tenant connected to Safetica
- The required Microsoft licenses mentioned here.
- Admin access to both Safetica console and Microsoft 365 admin center
Step 1: Activate Outlook protection in Safetica console
✍️Outlook protection currently supports auditing and protection of sent emails only.
-
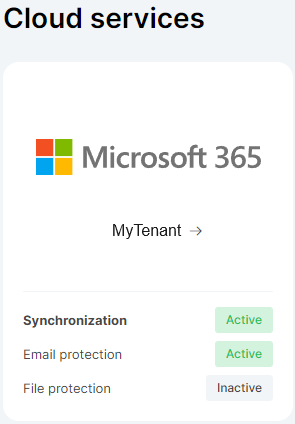
In Safetica console, go to Cloud services, and click your M365 tenant.
-
Click Activate Outlook protection.

-
Review the list of steps you must perform to enable Outlook protection.
-
Check the box and click Finish.
-
Proceed to distribute and deploy the Outlook add-in.
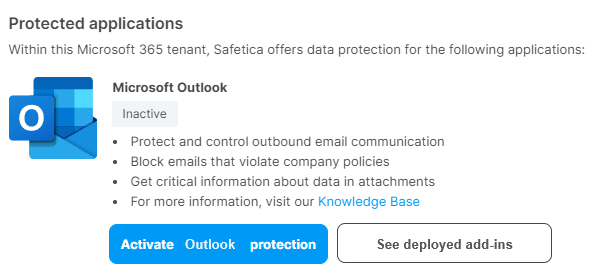
❗Completing the configuration in the Microsoft 365 admin center is required for Outlook protection to work correctly.
Step 2: Allow Outlook on the web to access your local network
❗This step is required for the Outlook add-in to work correctly. Without it, the add-in won't be able to communicate with Safetica Client, and protection will be limited - as if Safetica Client weren't installed at all.
Chromium-based browsers (like Chrome and Edge) recently introduced a security feature called Local network access restrictions. This feature can block the Outlook add-in from communicating with Safetica Client on your devices. To keep the add-in working correctly, you'll need to use one of the two options below:
Option A: Admin pre-approves access via Group Policy
The admin can set up a Group Policy that allows Outlook on the web to access the local network. This involves adding Outlook's web address to the allowed list using one of these policies:
- Microsoft Edge: LocalNetworkAccessAllowedForUrls
https://learn.microsoft.com/en-us/deployedge/microsoft-edge-browser-policies/localnetworkaccessallowedforurls - Google Chrome: LocalNetworkAccessAllowedForUrls https://chromeenterprise.google/intl/en_ca/policies/local-network-access-allowed-for-urls/
The following URLs must be added to the policy value:
- https://outlook.cloud.microsoft
- https://outlook.office.com
Option B: User approves the browser popup
When a user composes a new email in Outlook on the web, the browser will display a popup asking to allow local network access. The user just needs to click Allow once - after that, the add-in will work normally with no further action needed. 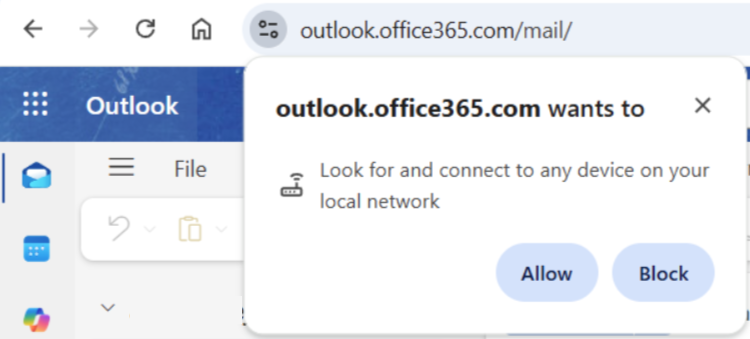
Step 3: Distribute and deploy the Outlook add-in in your company
Deploying the Outlook add-in pre-installs it for the selected users. To deploy the add-in:
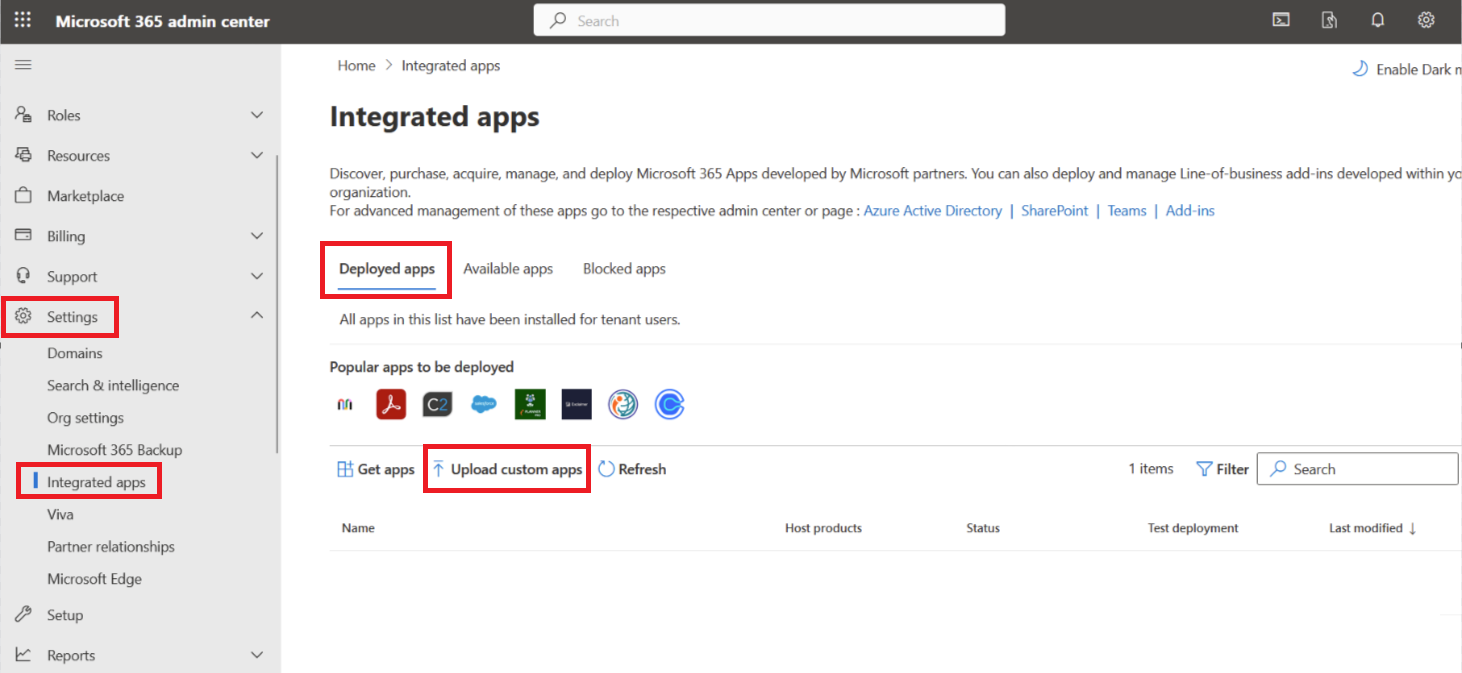
- Go to Microsoft 365 admin center.
- In the left navigation panel, click Settings > Integrated apps.
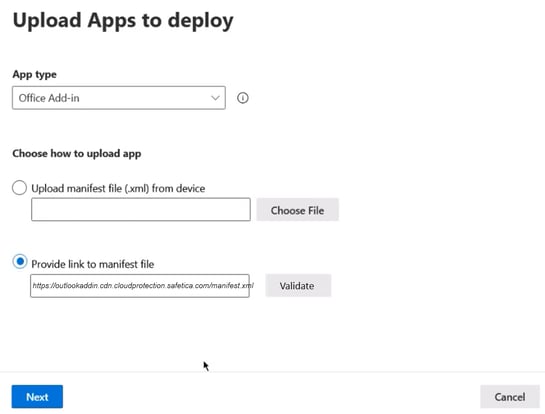
- On the Deployed Apps tab, click Upload custom apps.

- For App type, select Office Add-in.
- Under Choose how to upload app, select Provide link to manifest file, and enter the URL for your region:
- EU data center: https://outlookaddin.cdn.cloudprotection.safetica.com/manifest.xml
- US data center: https://outlookaddin.cdn.us.cloudprotection.safetica.com/manifest.xml
- Once the manifest uploads, click Next.
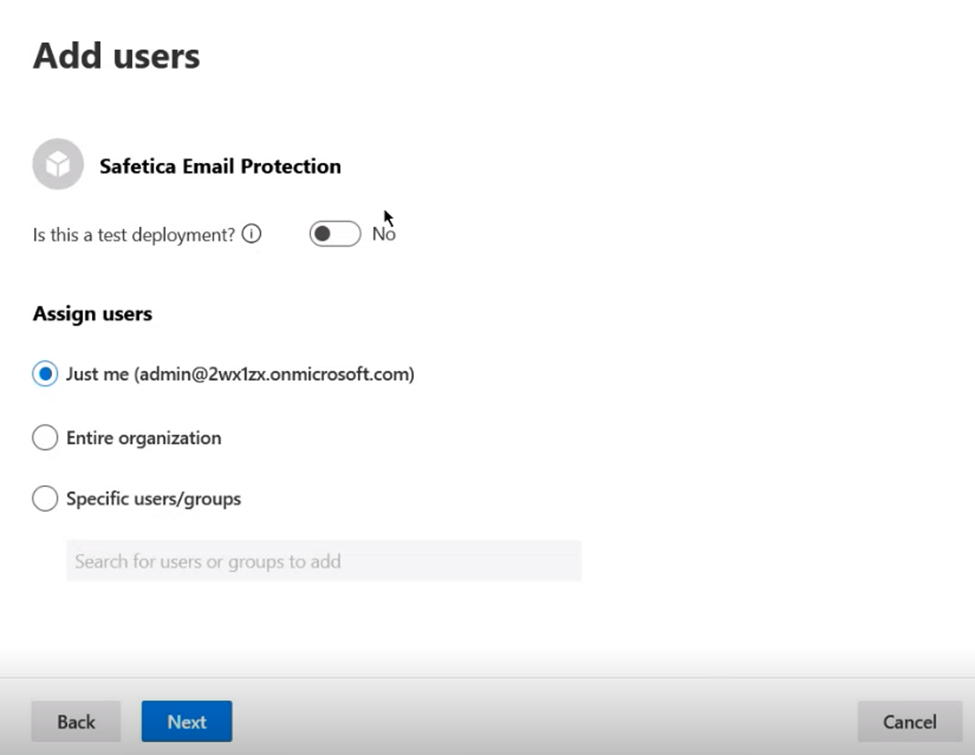
- Choose who should receive the add-in:
- Entire organization: all users in your tenant
- Specific users/groups: Microsoft 365 groups, security groups, or distribution groups
- Just me: for testing before a wider rollout
- You can choose Test deployment if you want to wait to deploy the app to the entire organization.

- Click Next.
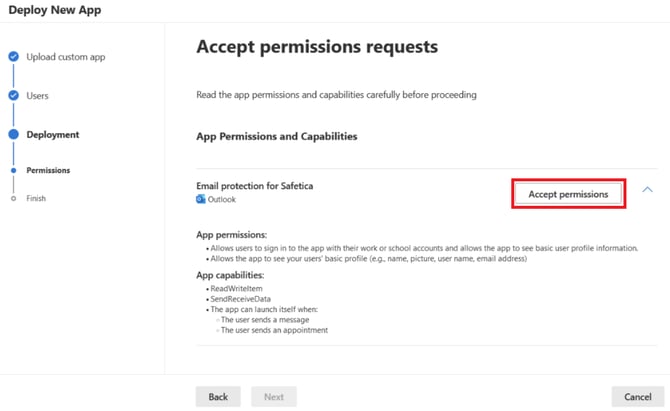
- Review the add-in’s permissions (e.g., responding to sending an email, reading the name and email address of the users working in Outlook, etc.) and click Next.
- Review the deployment summary and click Finish deployment.


After deployment
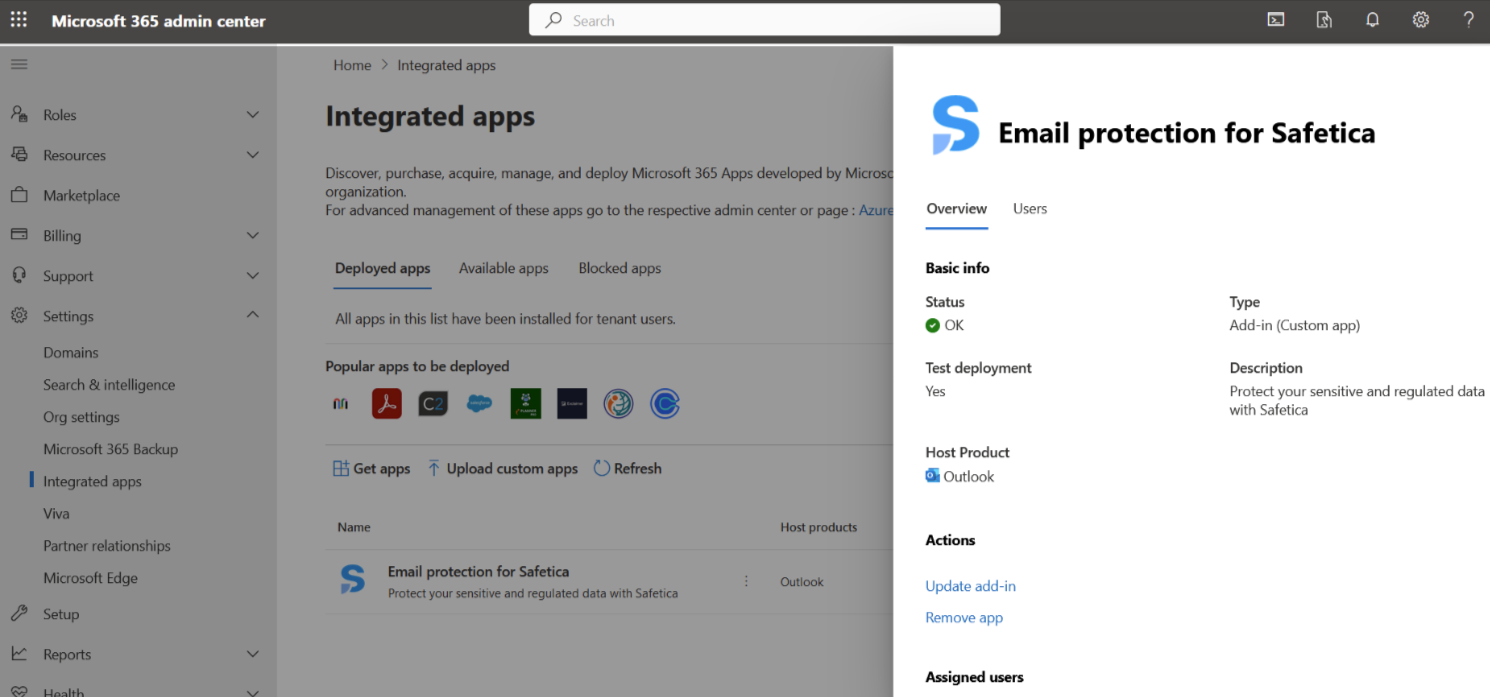
The Outlook add-in will appear in your list of custom add-ins as Email protection for Safetica.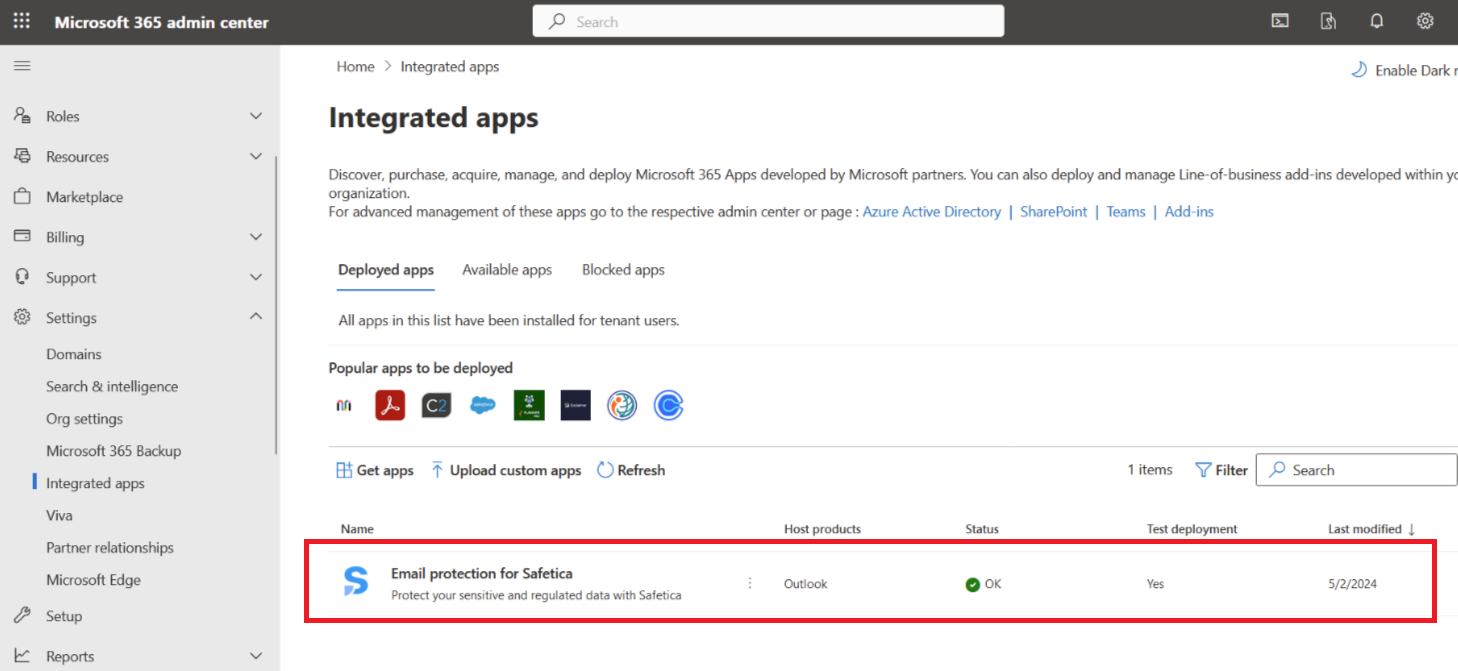
Click it anytime to view details, update, or remove it. Here you can also make further changes.
❗The deployment of Outlook add-in may take some time (sometimes even a few days) depending on the speed of Microsoft deployment process.
✍️Learn where to find a transparent overview of your active add-ins here.
Troubleshooting
Issue: Error when migrating between EU and US data centers
When migrating between data centers, you try to update the manifest from one region to the other (e.g., EU to US) and see an error.
Cause: You can’t swap manifest URLs directly. The existing add-in must be fully removed first.
Solution:
-
Fully deactivate Outlook protection, including the Outlook add-in.
-
Complete the data center migration
-
Re-activate Outlook protection using the new region’s manifest URL. Learn more about migrating between data centers here.
Read next
Outlook protection: Block (with override) in Outlook
Exchange protection: How to activate and deactivate it
SharePoint protection: How to activate and deactivate it